Windows 10 Development - Localization
Windows is used worldwide, in a variety of different markets and for the target audiences that vary in culture, region, or language. Localization is the translation of application resources into localized versions for the specific cultures that the application supports.
When you develop any application in only one language, it means you are just limiting your business and customers. If you want to increase your customer base, which will also increase your business, then your application must be available and reachable globally. Cost-effective localization of your product is one of the best and most economical ways to reach more customers.
In Windows 10, localizable applications is very easy to create with resx file, which is the simplest solution for localization.
Let us understand this with the help of a simple example by following all the below mentioned steps.
Translating UI Resources
You can put string resources for your UI into resource (resw) files instead of putting them directly in code or markup, and then you can reference those strings from your code or markup. Follow the steps given below to add strings to the resource files.
Create a new Universal Windows Platform (UWP) application.
In the Solution Explorer, right-click the project and select Add > New Folder.
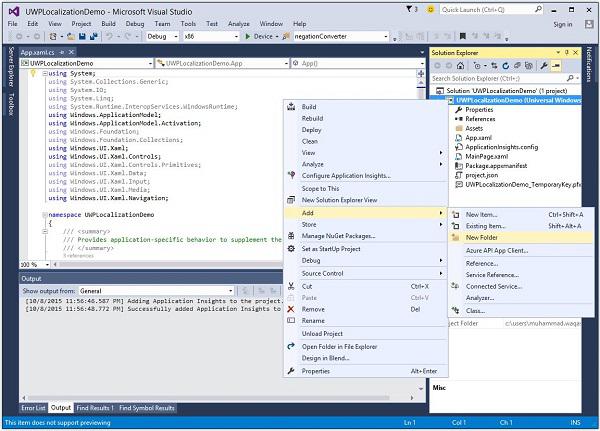
Change the name of the new folder to "Strings".
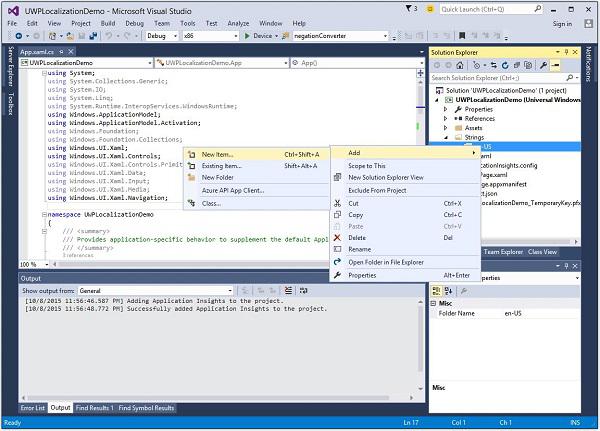
Right-click the Strings folder and add a new folder with the name "en-US". These are naming conventions specific to a language and country/region name, and it can be found on National Language Support (NLS) API Reference msdn.microsoft.com page.
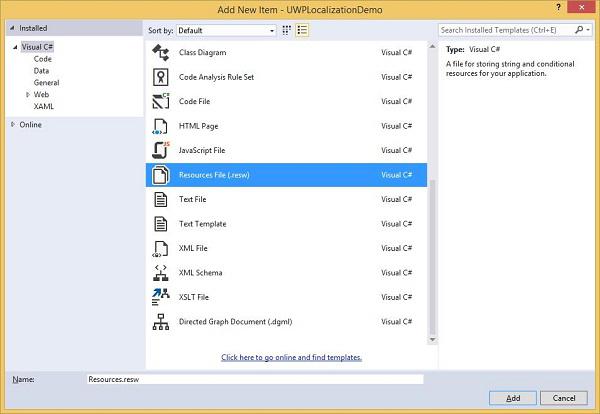
Right-click on the en-US folder and select Add > New Item….
- The following dialog will open.
<Page
   x:Class = "UWPLocalizationDemo.MainPage"
   xmlns = "http://schemas.microsoft.com/winfx/2006/xaml/presentation"
   xmlns:x = "http://schemas.microsoft.com/winfx/2006/xaml"
   xmlns:local = "using:UWPLocalizationDemo"
   xmlns:d = "http://schemas.microsoft.com/expression/blend/2008"
   xmlns:mc = "http://schemas.openxmlformats.org/markup-compatibility/2006"
   mc:Ignorable = "d">

   <Grid Background = "{ThemeResource ApplicationPageBackgroundThemeBrush}">
      <Hub x:Name = "textBlock" x:Uid = "HubControl" Background = "Black"
         Foreground = "White" Header = "Localization Demo"/>
   </Grid>

</Page>
x:Uid = "HubControl" are the identifiers that are used for localization
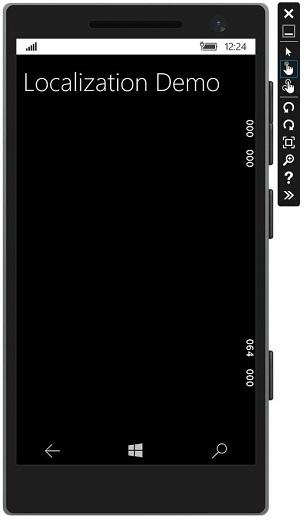
Now, when the above code is compiled and executed, you will see the following window.
All the information related to the Hub such as the Header, the Foreground and the background color are set in the XAML.
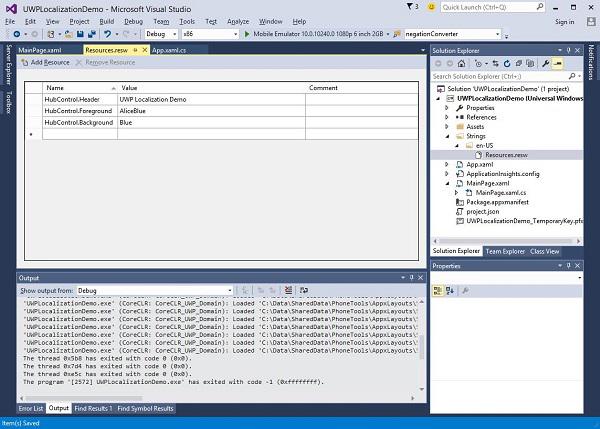
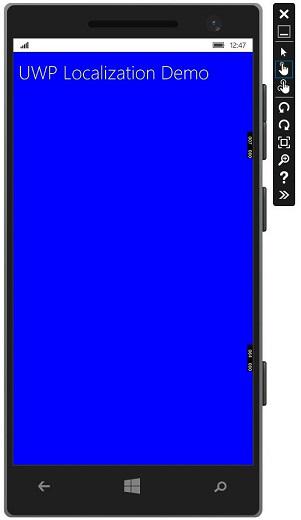
Now, when you compile and execute your application on an emulator, you will see the following window. You can see that the header, foreground and background color values are picked from the Resources.resw file.
You can add other Resource.resw files for other languages such as French, German, and Japanese etc. manually, as we did for English-US, but Microsoft also provides a Multilingual App Toolkit with the help of which, you can easily translate your Resource.resw in to other languages.
Go to the Tools > Extensions and Update menu and search the Multilingual app toolkit.
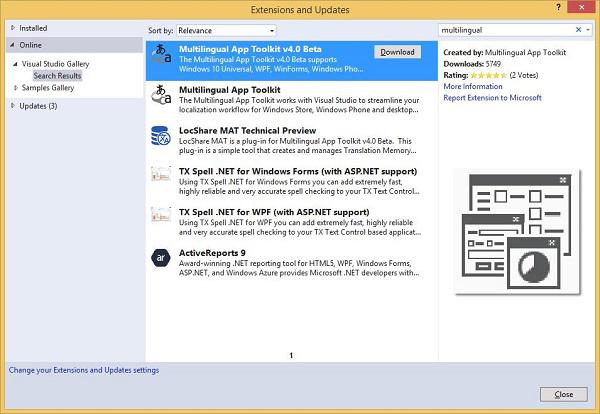
Download and install this toolkit. Once installation is finished, restart Visual Studio and open the same project.
Now enable this toolkit from the Tools > Multilingual App Toolkit menu option.
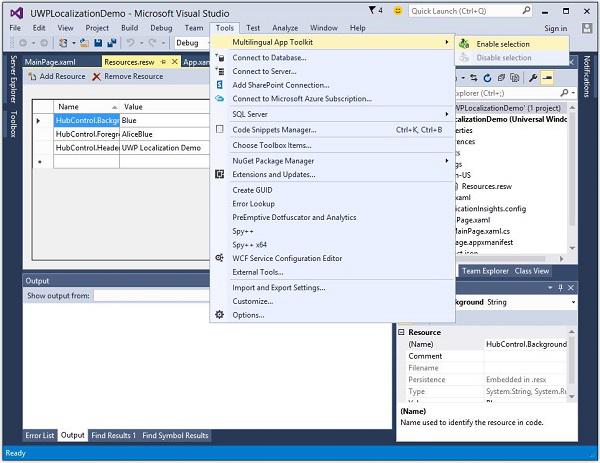
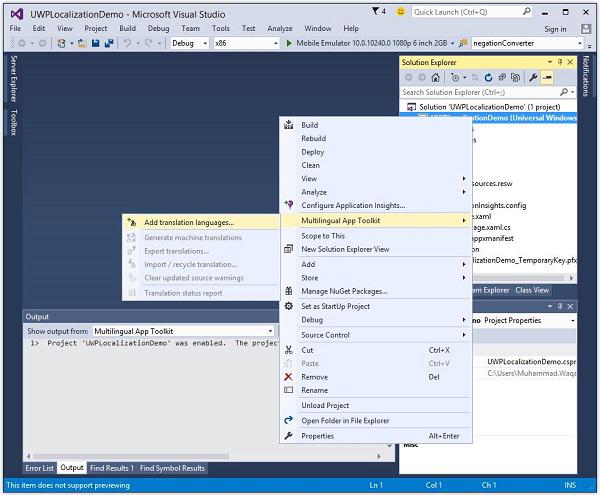
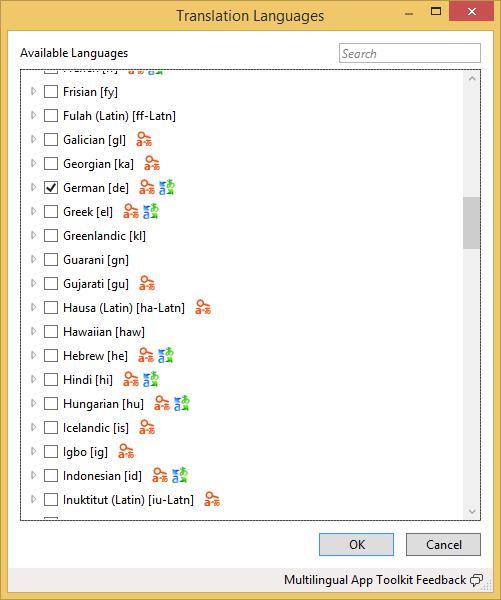
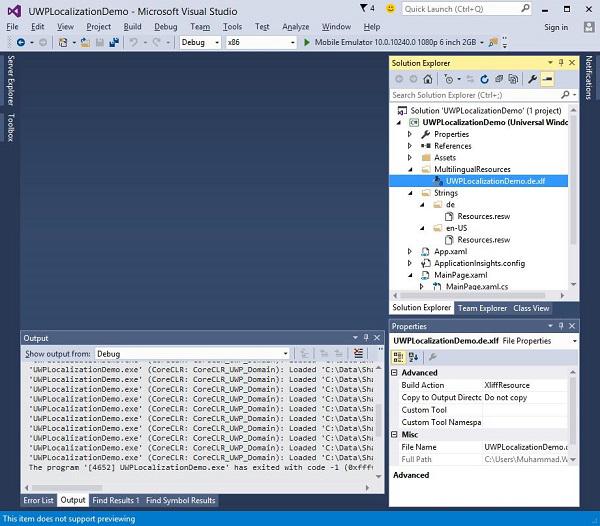
You can also see that the Resources.resw file is created inside the folder Strings\de.
Now, you will see that another MultiLingualResources is added inside the *.xlf file. Double click on this file, which will open the Multilingual editor to check and verify the translated strings and make some changes if needed.
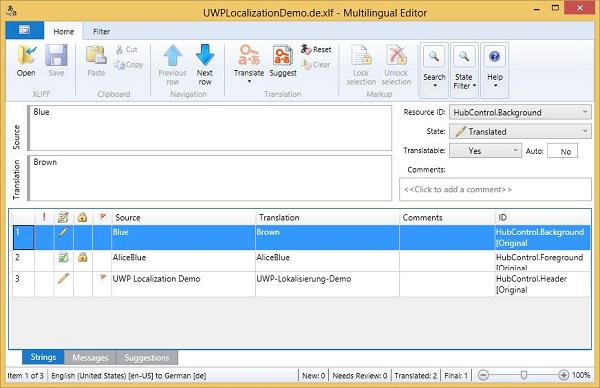
Make the changes and verify whether the Background color has changed to brown and the Header text is properly translated to German.
As in the above example, the background color of Hub has changed from blue color to brown and the foreground color has remained same.
Now open the Resources.resw, which is inside the Strings\de folder.
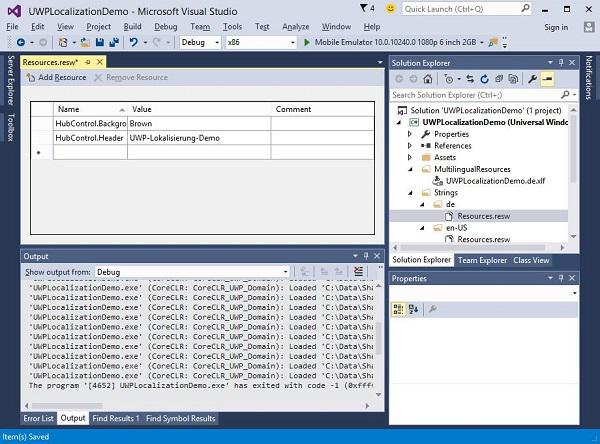
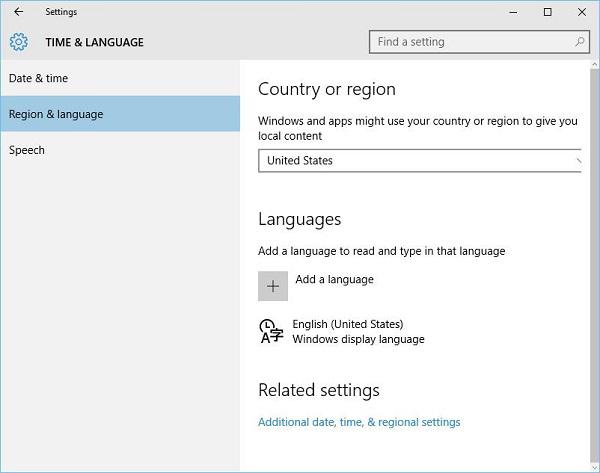
To check the localized version of your application, change the culture of your machine. To change the culture of your machine follow the steps given.
- Let us go to the PC settings and select Time & Language.
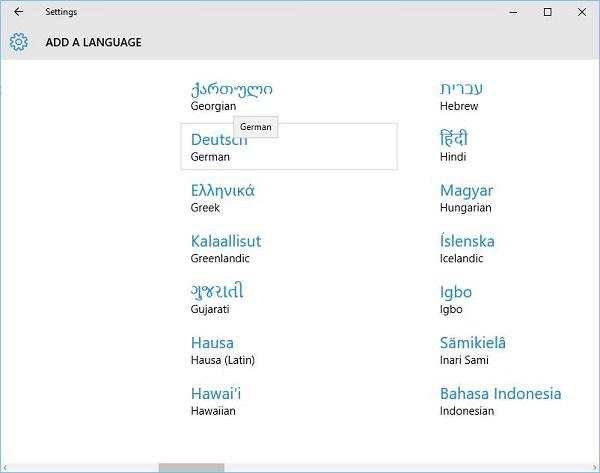
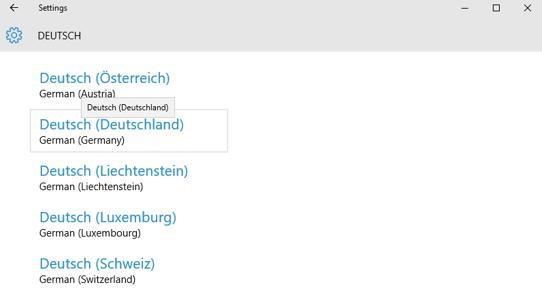
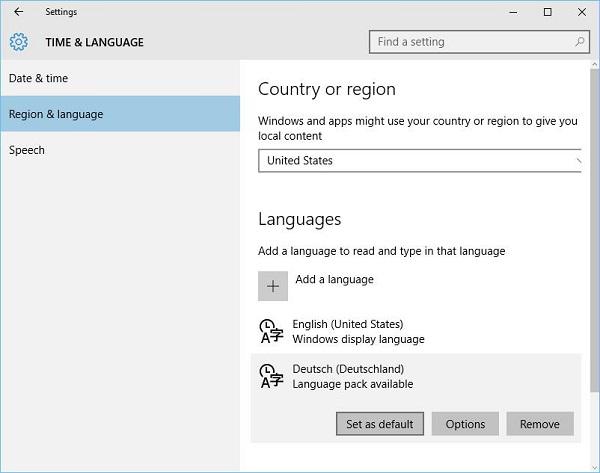
- Make Deutsch as the default language.
- Now execute your application, it will display the following window.
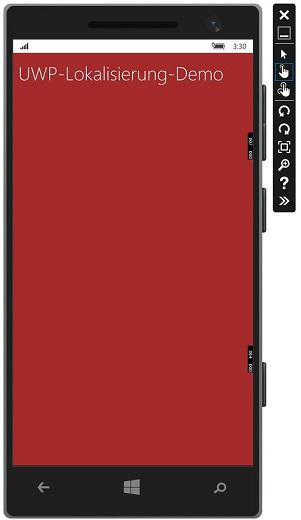
- Now you can see the output of your application in German language.


