Filters are used to narrow down or expand the lists of items displayed in a page. It helps to focus on items that are important.
Filter is available on each page and section at the left side as shown in the screenshot below −
Filters come with a wide range of options and features. A user can make use of the filters according to his requirements. Consider the following are few important features of filters −
Select multiple filters at a time.
Add multiple values for each field.
Filter by more than one Owner, Team or Priority.
Filter checkboxes, dates and numbers.
Use LESS THAN and GREATER THAN.
Use BEFORE and AFTER, in addition to IS.
Press the Enter key while typing in the Find supported filter field.
Use the CTRL+SHIFT+F keyboard shortcut to invoke the filter options.
The use of filters helps to get the desired data on the page and trim off the unwanted data from the user perspective. Following steps display how a user can utilize the filter functionality −
Click on Filter dropdown that displays the all available option.
A user can select any of the option at a time.
If sub-options are available, a user can select those as well. For example, Status → Future, In Progress, Done, Accepted.
Priority → Unassigned, Low, Medium, High; Similarly, Team, Workitem, Rollup Category, Sprint, etc.
After selection, click on Apply (if sub-option is present), otherwise filter will be applied directly as soon as selected from dropdown as shown below −
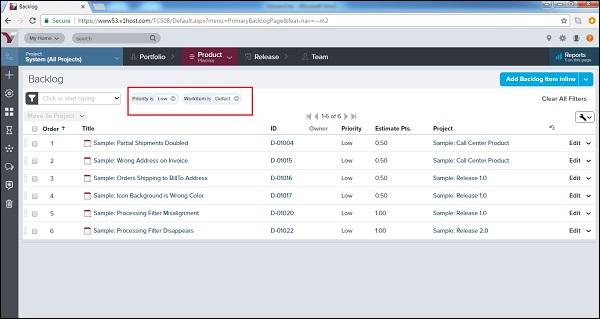
After selection, a user can see the selected filters at the right side of the filter as shown below −
After the application, a filter needs to be cleared as well. Next time, this makes it easy for the next user to fetch the details. In general terms, clear filter allows to display all details at the page.
To clear a single filter −
Click on the ‘-‘ symbol next to the name of the filter.
To remove the applied filters, restore the default settings −
Click Clear All Filters in the top right corner of the page.
The following screenshot displays how to clear the filters −