qTest - Test Design
In qTest – Test Design module, you can create, move, edit and view requirements within the Requirement Repository. qTest supports creating, updating, and deleting test cases as well. Additionally, qTest follows an approval workflow to manage the approval of test cases and when there is an additional functionality that can be enabled to prevent testers from executing any test cases, those not yet approved by stakeholders.
Creating a Test Case
To create a test case, you should have the Create Test Cases permission. Following are the steps to create a test case in the Test Design tab.
Step 1 − Go to the Test Design section.
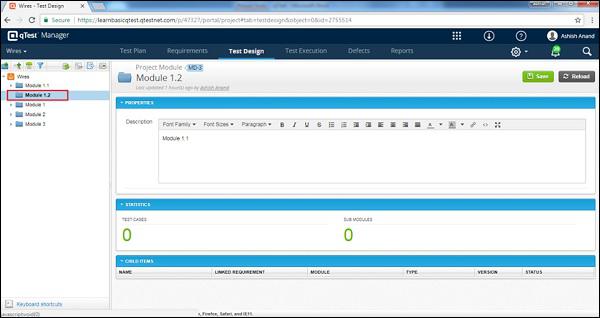
Step 2 − Select the Module where the Test Case should be created on the left Panel as shown in the following screenshot.
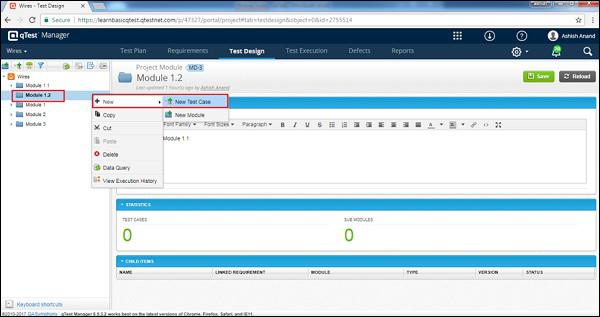
Step 3 − To create a new Test Case, right-click somewhere in the left panel and select New → New Test Case.
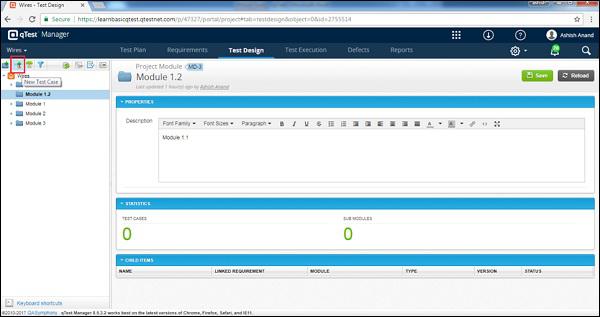
Step 4 − Click the New Test case icon/image on the left side of the panel as shown in the following screenshot.
The Create Test Case template opens up as shown in the following screenshot.
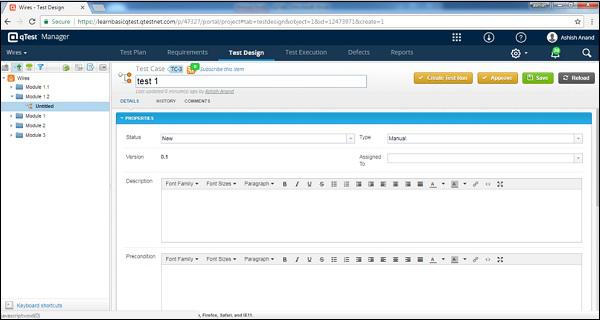
Step 5 − Enter the following fields in the form −
- Name of the Test case
- Status
- Type
- Assigned To
- Description
- Pre-Condition
- Priority
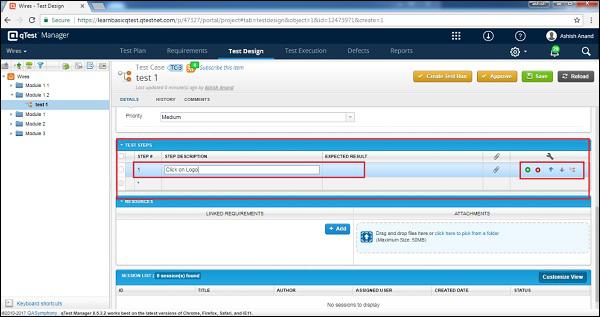
Step 6 − In the Test Step section, enter the Test Description and Expected Result. Use Shift + Enter to write into multiple lines for step 1. Then, press tab or click on the + sign to enter a new step. To re-order test steps, use the up-down arrows. To delete a test step, use the cross symbol.
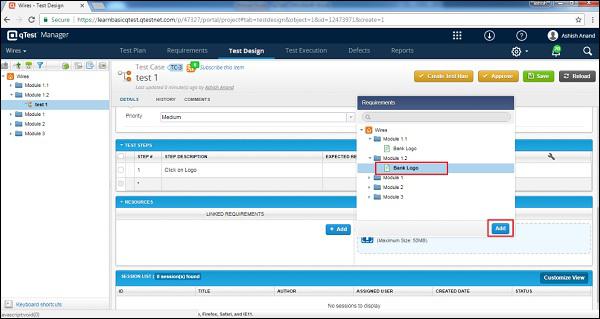
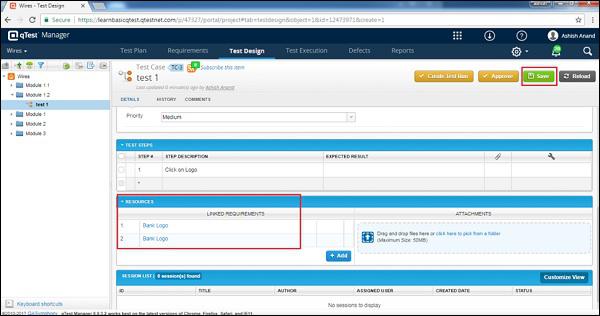
Step 7 − In the Resources tab, add Linked Requirements by clicking the Add button. A list of Requirements opens up. Select the requirements and click the Add button as shown in the following screenshot.
Step 8 − Click the Save button to save the test case as shown in the following screenshot.
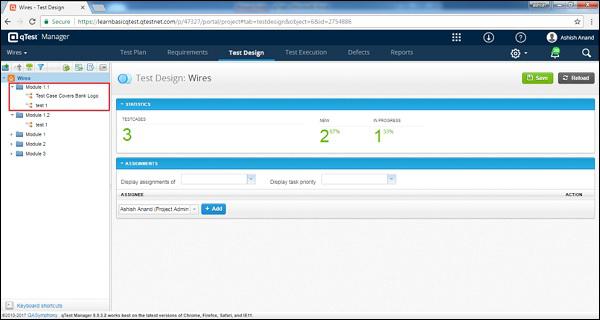
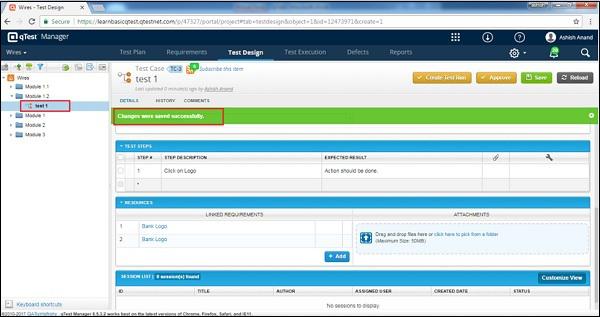
After clicking Save, you will receive a success message of the changes saved. Test case appears on the left panel below the module’s name as displayed in the following screenshot.
Edit a Test Case
To edit a test case, you should have the Edit Test Case permission. Following are the steps to edit a test case.
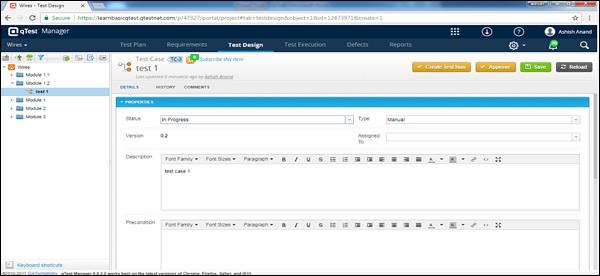
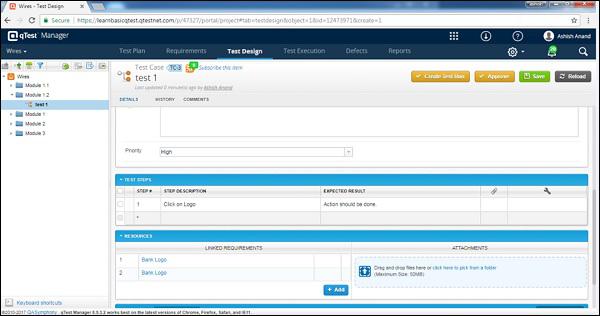
Step 1 − Select a Test case to Edit and double-click to explore further. Edit the test case’s properties such as Name, Status, Assigned To, Description, as shown in the following screenshot.
Step 2 − Click Save to finish editing.
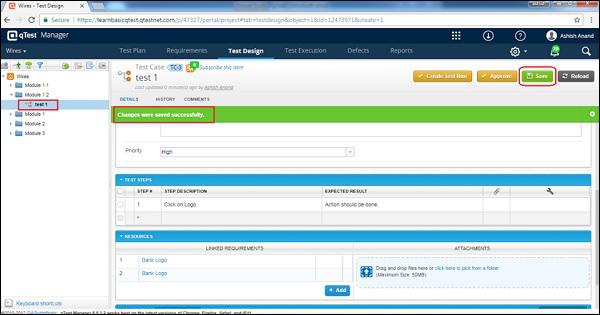
Note − Test Case’s version is updated by 0.1 each time whenever any changes are made and saved. The same version gets updated in test execution as well if it is added to test run.
Move/Copy a Test Case
This functionality allows creating a duplicate of a test case or reordering of test cases. You should have the create/edit test cases permission to perform this functionality. Following are the steps to move/copy a test case.
Step 1 − To copy/cut a single or multiple test cases, select test cases those need to copy/cut and right-click on the selected requirements.
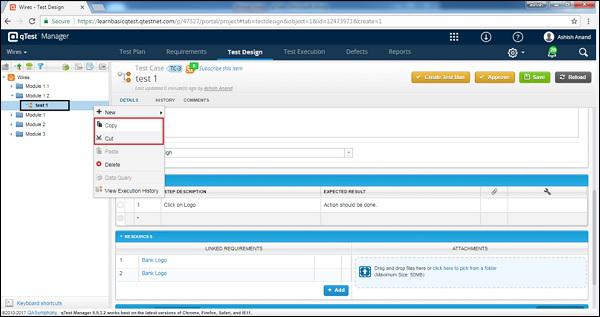
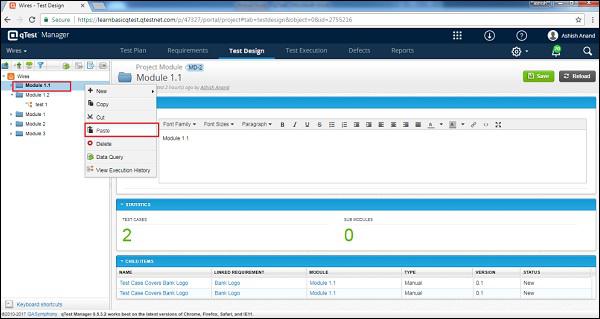
Step 2 − Now, select a module to paste and right-click. Select the paste option for those copied modules as shown in the following screenshot.
Delete a Test Case
In this section, we will understand how to delete a test case. Consider the following points while deleting a test case.
Multiple test cases can be deleted at a time.
You should have the Delete Test Case permission to delete a test case.
If the deleted test case was associated with a requirement, the association in the Requirement gets deleted as well.
Following are the steps to delete a requirement.
Step 1 − Select a single requirement or multiple requirements to delete.
Step 2 − Right-click the selected requirements and click Delete as shown in the following screenshot.
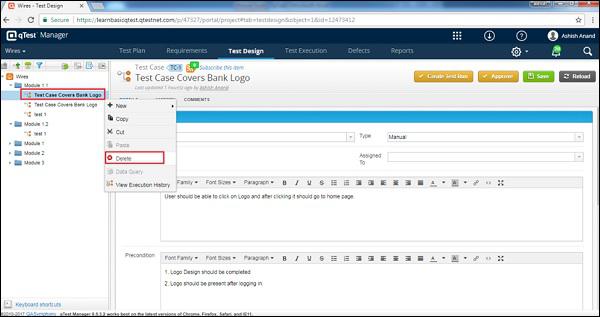
Step 3 − A dialog box will appear asking for confirmation to delete. Click YES as shown in the following screenshot.
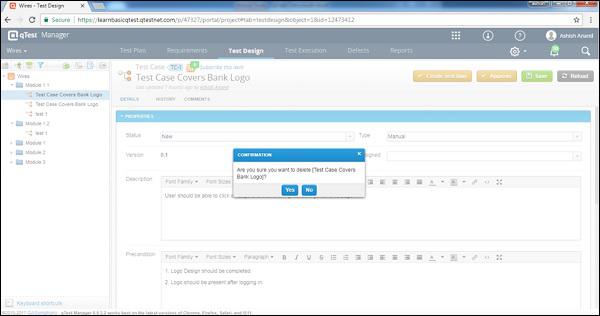
The page will be refreshed and the module will be deleted from the Requirement and Test Design panel.
