qTest - Modules Management
Modules are folder structures inside Requirements and Test Design menu. These modules contain Requirements and Test Cases in respective sections. You can define modules as a group of functionalities having the same nature of a product. The module structure gets synchronized automatically between Requirements and Test Design (Test cases).
Create a Module
To create a Module, you should have the Create Modules Permission. Following are the steps to create a Module −
Step 1 − Go to the Requirement or Test design section.
Step 2 − Select the root folder at the left Requirement Panel.
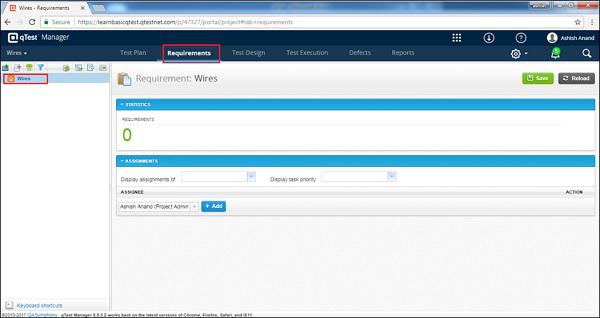
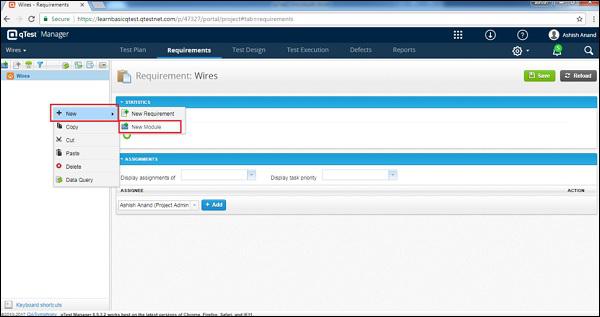
Step 3 − To create a new Module, use any of the options shown in the following screenshot. Right-click somewhere on the left panel and select New → New Module.
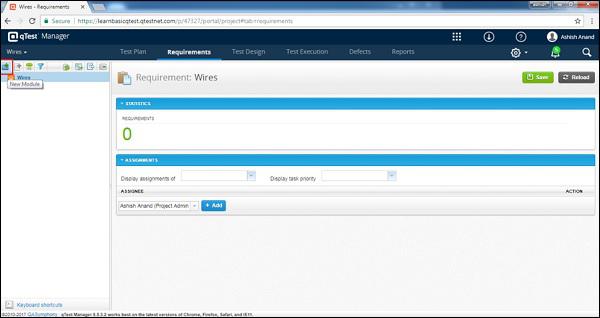
Step 4 − Click the New Module icon/image on the left side of the panel as encircled in red in the following screenshot.
Step 5 − Click any one of the options that opens the following Create Module form.
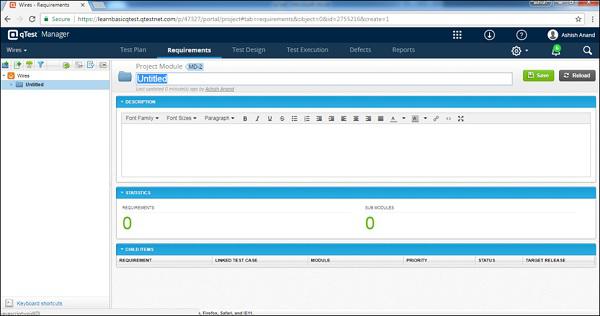
Step 6 − Enter the following fields in the form −
- Name of the module at the top
- Description
Note − The Module page has the statistics section. It displays the number of Requirements and sub-modules for the selected Module. In child items, it displays the detailed properties of individual requirements.
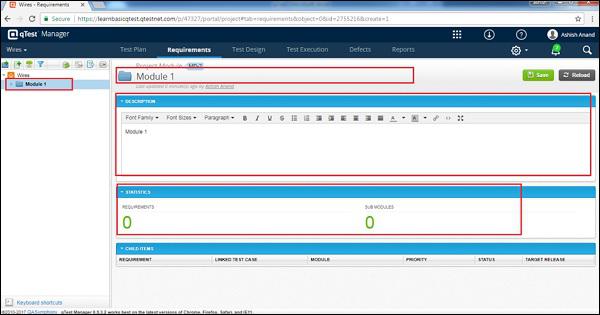
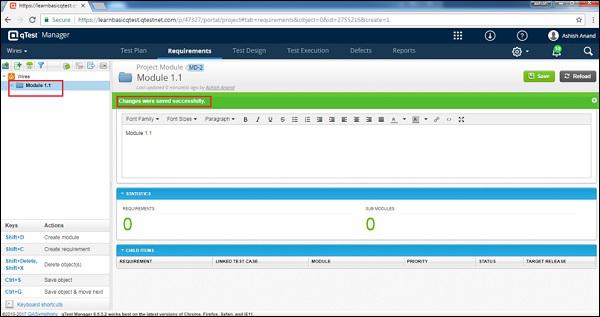
Step 7 − After entering the required details, click the Save button at the top right corner of the screen as displayed in the following screenshot.
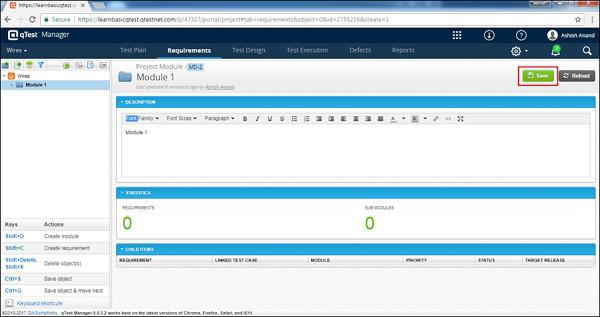
After clicking Save, you will receive a message which shows that the changes were saved successfully. The Module Name appears at the left panel below the project’s name as displayed in the following screenshot.
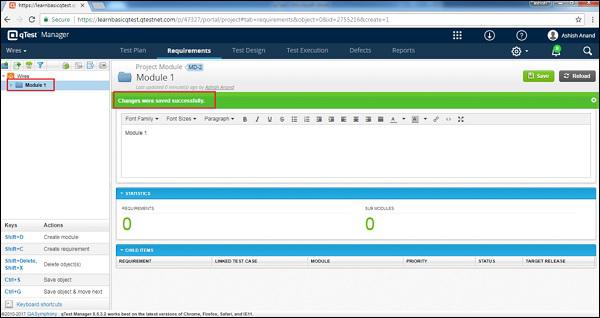
Note − A user can add up to 99 levels of sub-modules. The module form doesn’t support any custom fields.
Edit a Module
Let us now discuss how to edit a module. To edit a Module, you should have the Edit Modules Permission.
Following are the steps to edit a module −
Step 1 − Select a Module to Edit and double-click to explore it further.
Step 2 − Edit the Module’s Name and Description as shown in the following screenshot.
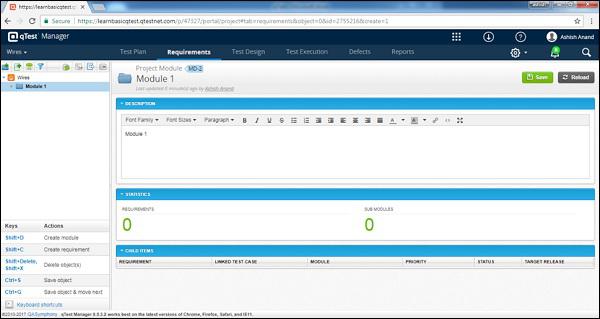
Step 3 − Click Save to finish editing.
Note − Any changes of the module in Requirement will update the Test Design and vice versa. Module structures are auto synced between Requirements and Test Designs.
Move/Copy a Module
To Move/Copy a Module, you should have the Create/Edit Modules Permission. This functionality allows creating a duplicate of a Module or reordering of the module structure.
Following are the steps to Move/Copy a Module.
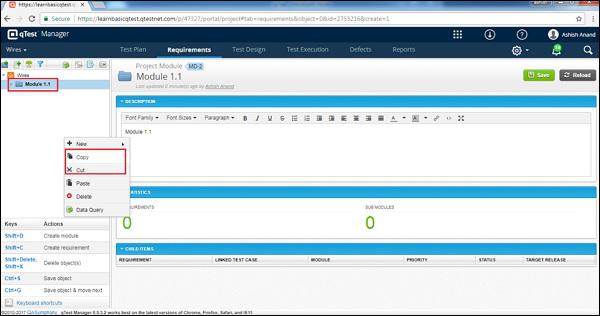
Step 1 − To copy/cut a single or multiple modules, select the modules. Right-click the selected builds.
Step 2 − Select Copy/Cut as shown in the following screenshot.
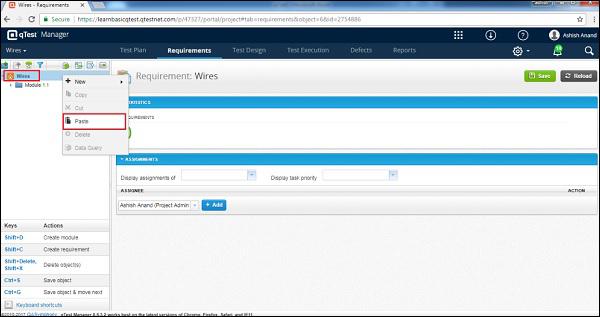
Step 3 − Now, select a module to paste and right-click it. Select the paste option for those copied modules as shown in the following screenshot.
Note − If a module has sub-modules while copying or moving the module, all other sub-modules will be copied/moved as well.
Delete a Module
To delete a Module, you should have the Delete Modules Permission. Consider the following points while deleting a module.
Multiple modules can be deleted at a time.
If a module has many sub-modules, even the sub-modules get deleted in the process of deleting the module.
Deleting modules in Requirement will also delete the synced modules in Test Design and vice versa.
A module can have requirements, test cases, etc. - while deleting it, it will delete all of these items.
Following are the steps to delete a build.
Step 1 − Select a single module or multiple modules to delete.
Step 2 − Right-click the selected modules and click Delete as shown in the following screenshot.
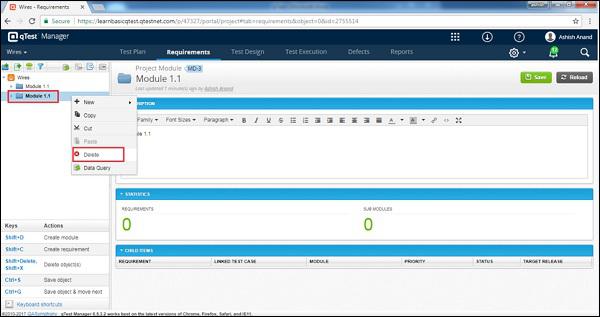
Step 3 − A dialog box will appear asking for confirmation to delete. Click YES as shown in the following screenshot.
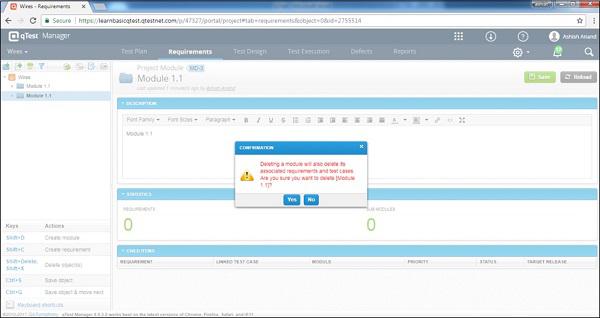
The page will be refreshed and the module will be deleted from the Requirement and Test Design panel.


