qTest - Test Plan & Build Management
To achieve the objective of a Release, there could be multiple builds. Build is always associated with only one Release. A build fulfills partial objective of Release with limited functionalities.
Build can be created only inside a Release, not in the root folder. If a Release gets closed, Build will automatically change to close status. Build scope defines within the release scope. If one requirement is defined into multiple builds, the requirement link will move to a new one from the old build.
Create a New Build
To create a Build, you should have the Create Builds Permission. Follow these steps to create a Build.
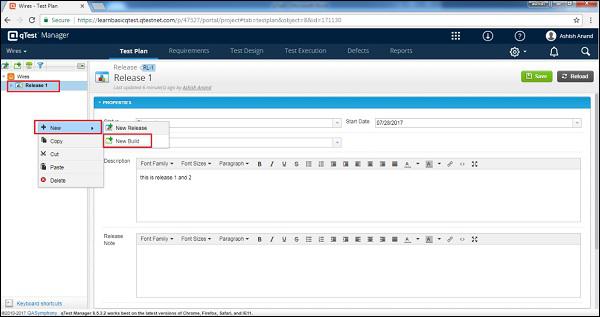
Step 1 − To create a new Build, select a Release and use any of the options as shown in the screenshot given below. Right-click somewhere in the left panel and select New → New Build.
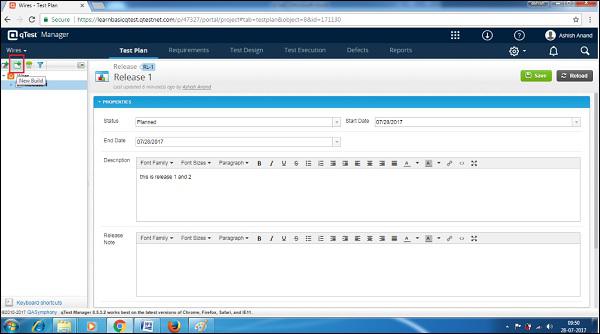
Step 2 − Click the New Build icon/image on the left side of the panel as shown in the following screenshot.
Step 3 − Choosing any one of the options opens the Create Build form.
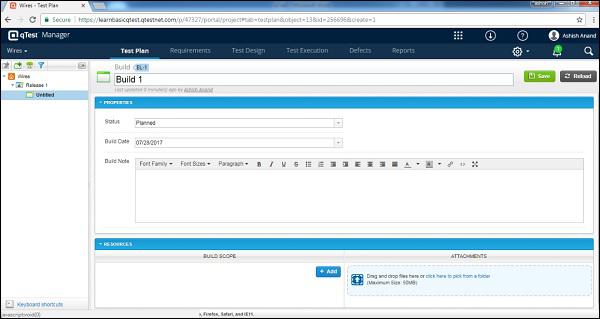
Step 4 − Enter the following fields in the form −
- Name of Build
- Status
- Build Date
- Build Note
- Resources as Build Scope
- Attachments, if any
Note − Make sure that the Build Date is within the Release Timeline. The date should be in sync with Test Execution.
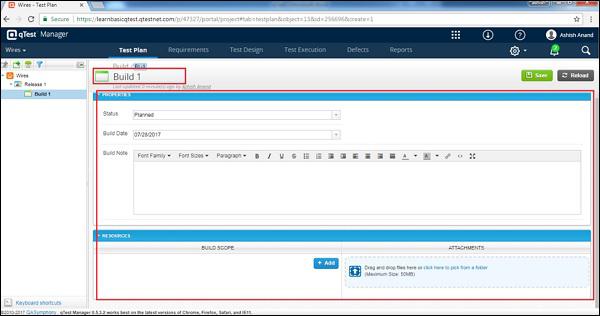
Step 5 − After entering all the details, click the Save button present at the top right hand corner of the screen.
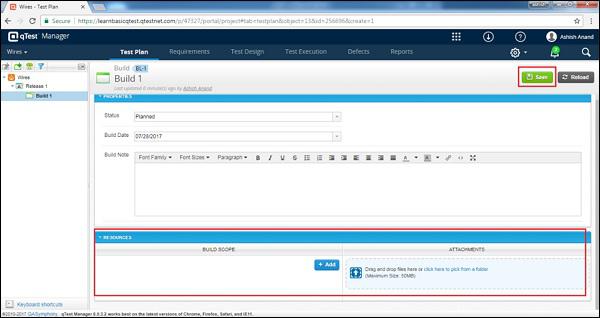
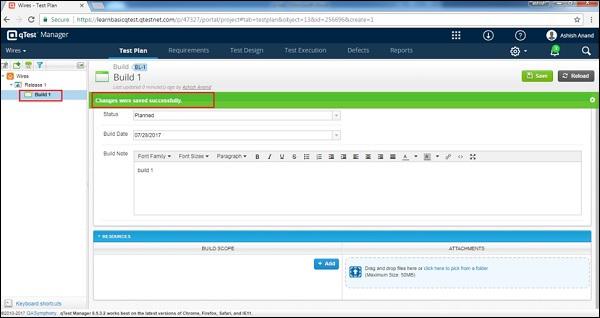
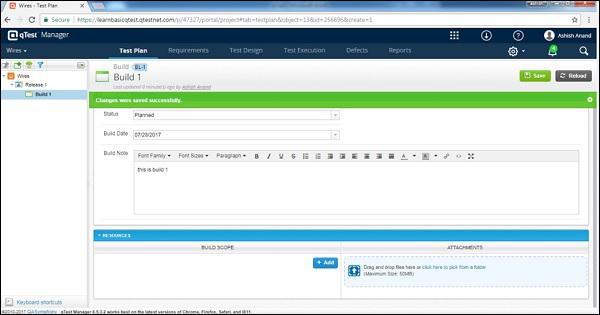
After clicking Save, you will receive a message which shows that the changes made were saved successfully. The Build Name appears on the left panel below the project’s name as displayed in the following screenshot.
Edit a Build
In this section, we will understand how to edit a Build. To edit a build, you should have the Edit Builds Permission.
Follow these steps to edit a build.
Step 1 − Select a Build to Edit and double-click to open the details.
Step 2 − Edit the Build’s Name, Properties, Status, Build Date, Build Note, or any other fields as shown in the following screenshot.
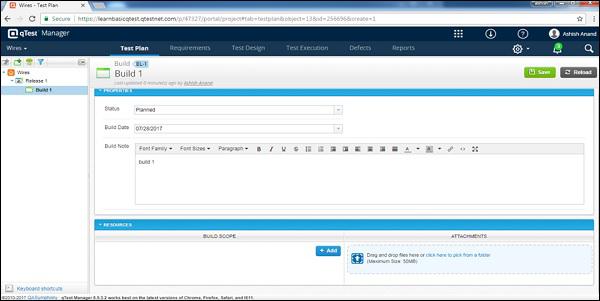
Step 3 − Click Save to finish editing.
Move/Copy a Build
To Move/Copy a build, you should have the Create/Edit Builds Permission. This functionality allows creating a duplicate of a Build or reordering of the build structure. Follow these steps to move/copy a Build.
Step 1 − To copy/cut a single or multiple builds, select builds. Right-click the selected builds.
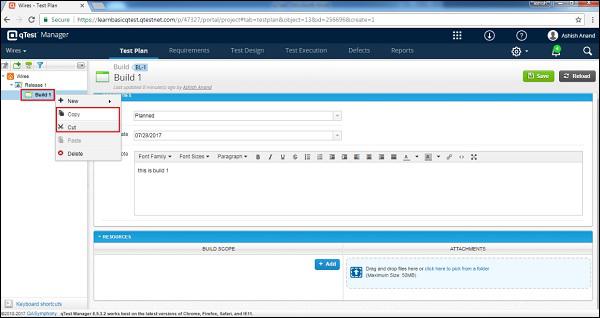
Step 2 − Select Copy/Cut and click as shown in the following screenshot.
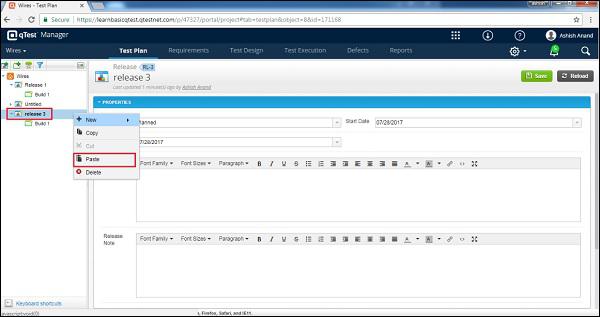
Step 3 − Now, select a release to paste and right-click. Select to paste the copied builds as shown in the following screenshot.
A closed build can also be copied, however it cannot be cut. It copies only the properties but not the scope and attachment.
Delete a Build
To delete a Build, you should have the Delete Builds Permission. Consider the following points while deleting a Build.
Multiple builds can be deleted at a time.
You cannot delete builds under closed Releases.
If a build is associated with an object in Test Execution as Test Suite, Test Run, or Test Cycle, before deletion you should remove the association. Otherwise, the delete functionality won’t work.
Follow these steps to delete a build.
Step 1 − Select a single build or multiple builds to delete.
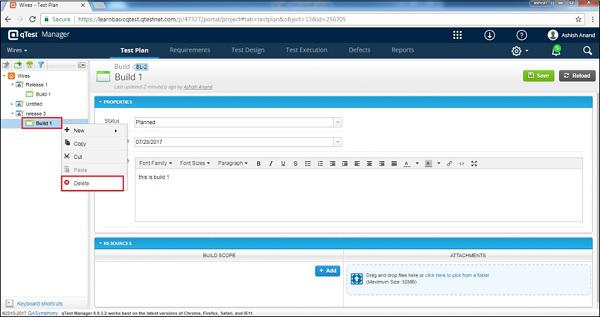
Step 2 − Right-click the selected build and click Delete as shown in the following screenshot.
Step 3 − A dialog box appears asking for confirmation to delete; click YES as shown in following screenshot.
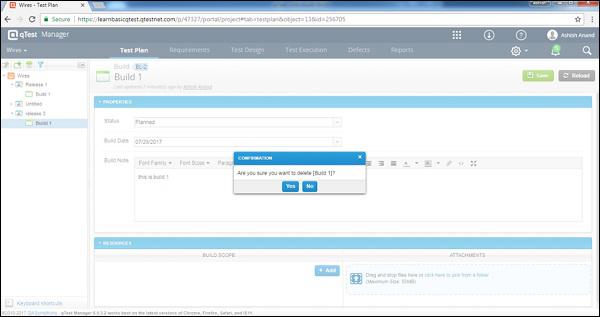
The page will be refreshed and the build will be deleted from the Test plan panel.


