qTest - Requirements
In this chapter, we will understand the requirements of qTest. Consider the following points to understand the requirements of qTest.
qTest has a simple and flexible interface for Requirements. It syncs the project requirements structure to the test design structure automatically.
Using this interface, you can create, edit, move, and delete requirements within the Requirement repository.
Requirements can be created internally as well as imported externally from third party tools such as JIRA, Version One, etc.
A defect can be a link to a Requirement. The flow will be as Defects → Test Run → Test Case → Requirement → Test Plan.
You can track Requirement Traceability and Test Execution report.
Create a New Requirement
Requirements are always placed into modules. Before we start to create a requirement, the Module structure should be completed.
Following are the steps to create a Requirement.
Step 1 − Go to the Requirement section.
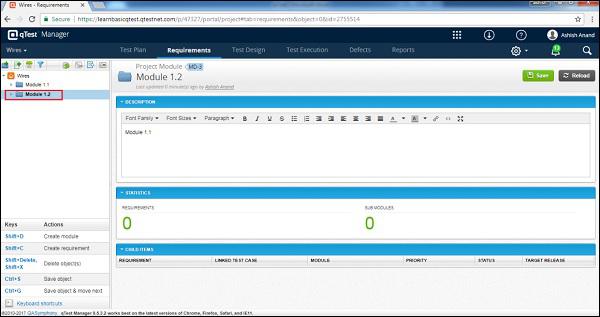
Step 2 − Select the Module where the requirement is to be created at the left Requirement Panel.
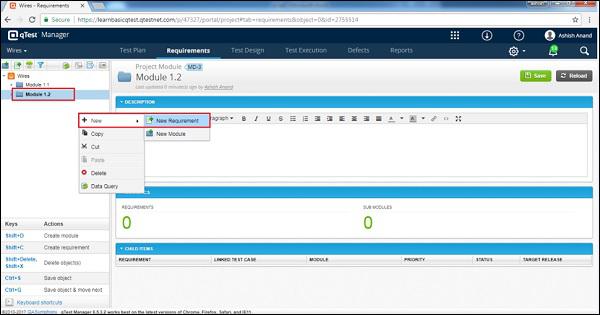
Step 3 − To create a new Requirement, right-click somewhere on the left panel and select New → New Requirement. Following screenshot displays this step.
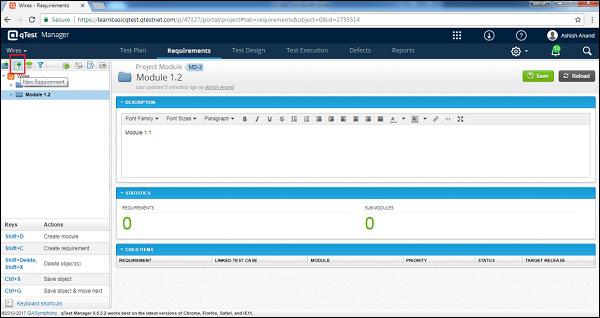
Step 4 − Click the New Requirement icon/image on the left side of the panel as shown in the following screenshot.
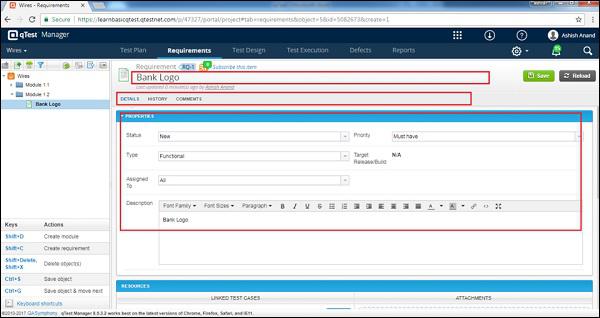
Step 5 − Click one of the options to open the Create Requirement form as shown in the following screenshot.
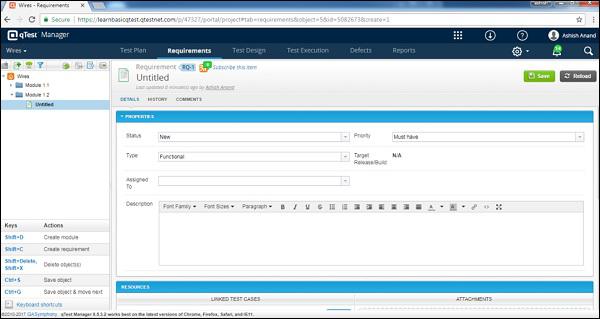
Step 6 − Enter the following fields in the form −
- Name of the Requirement
- Status
- Priority
- Type
- Assigned To
- Description
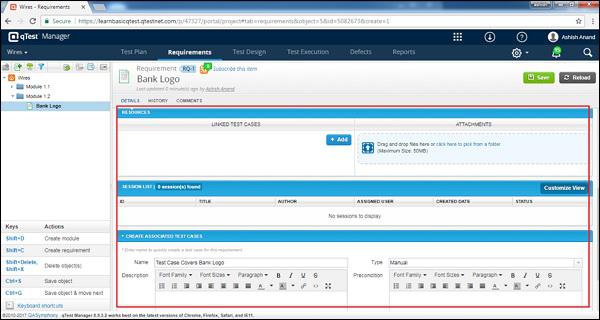
In the Resource section, the Link test case option is available. It is not mandatory to create Requirements right then. This can be done at a later stage as well.
The Create Associated Test Cases option is not mandatory and can be managed later too.
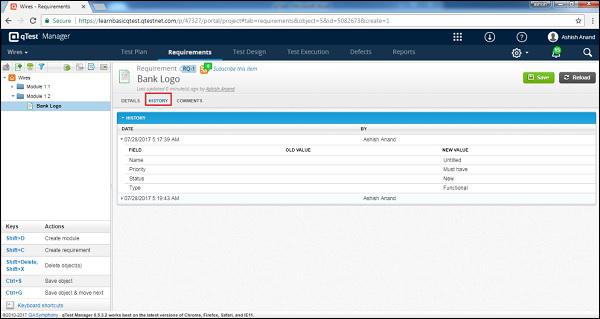
In the History tab, you can view all past actions performed on this Requirement.
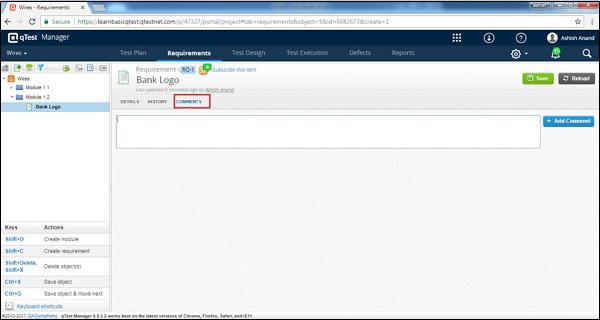
Step 7 − In the Comment tab, add comments and notes for reference as shown in the following screenshot.
Step 8 − After entering all details, click the Save button present at the top right corner of the screen.
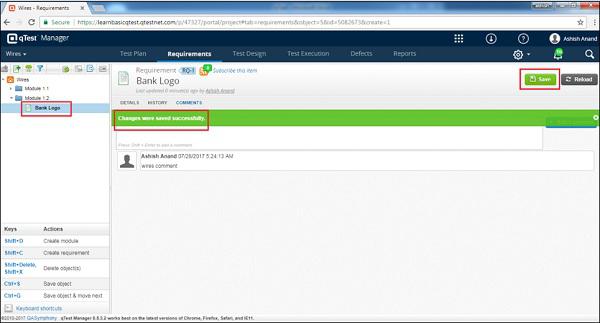
After clicking Save, you will get a success message of the changes made. The Requirement Name appears at the left panel below the project’s name as displayed in the following screenshot.
Edit a Requirement
While editing a Requirement, changes will be notified for linked test cases as well as for review. Following are the steps to edit a requirement.
Step 1 − Select a Requirement to edit and double-click to open the details.
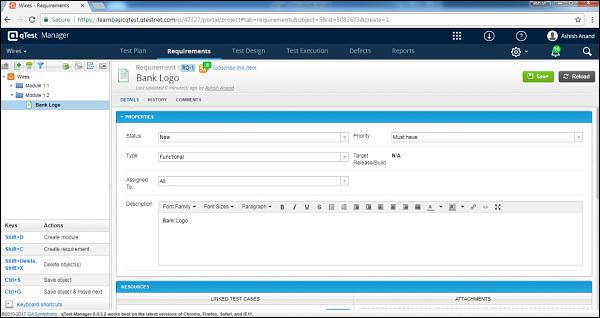
Step 2 − Edit the Requirement’s properties such as Name, Status, Assigned To, Description as shown in the following screenshot.
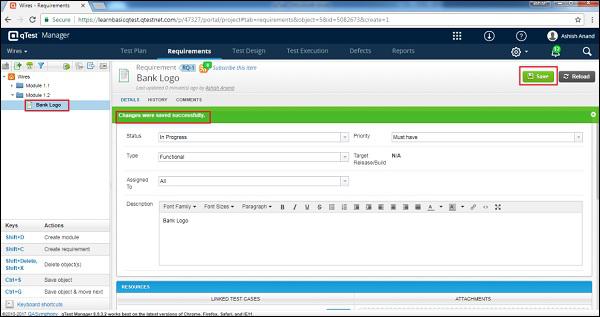
Step 3 − Click Save to finish editing.
Move/Copy a Requirement
This functionality allows creating a duplicate of a Requirement or reordering requirements. Following are the steps to Move/Copy a Requirement.
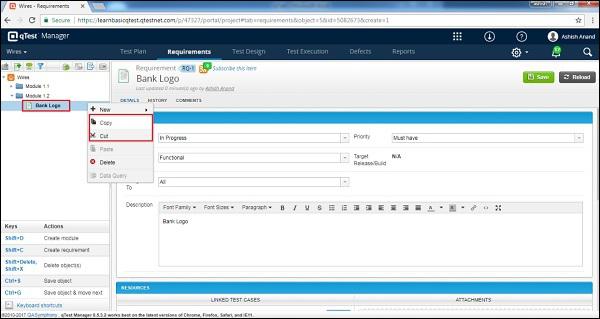
Step 1 − To copy/cut a single requirement or multiple requirements, select the requirements that need to copy/cut and right-click the selected requirements.
Step 2 − Select Copy/Cut and click as shown in the following screenshot.
Step 3 − Now, select a module to paste and right-click. Select the paste option for the copied modules as shown in the following screenshot.
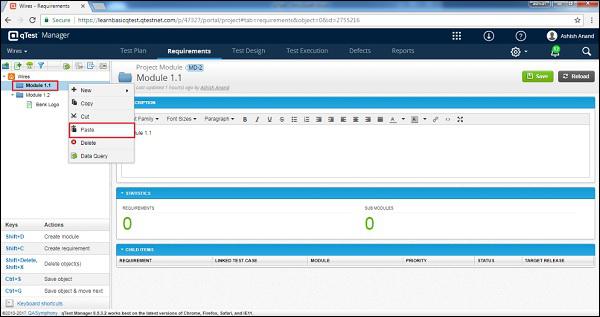
Delete a Requirement
We will now discuss how to delete a requirement. Consider these points while deleting a requirement −
- Multiple requirements can be deleted at a time.
- Deleting a requirement will not create an impact on the linked test cases.
- Linked test cases will be available in Test Design.
Following are the steps to delete a requirement.
Step 1 − Select a single requirement or multiple requirements to delete.
Step 2 − Right-click the selected requirements and click Delete as shown in the following screenshot.
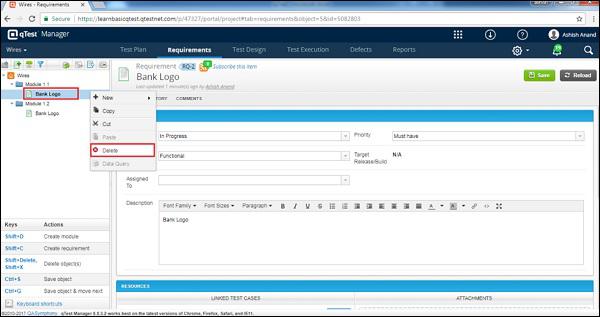
Step 3 − A dialog box will appear asking for confirmation to delete. Click YES as shown in the following screenshot.
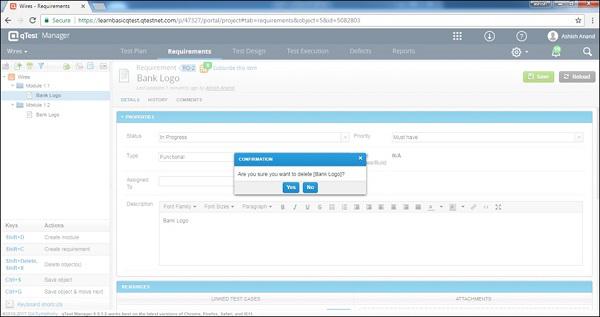
The page will be refreshed and the module will be deleted from the Requirement and Test Design panel.


