SAP SCM - Models and Versions
In SAP SCM, you use supply chain model for the planning. SAP system considers the master data that is assigned to a model for the planning purpose. You can assign the master data to a model either in the Supply Chain Engineer or in master data.
It is also possible to assign one or more planning versions to a model. All the master data released for the planning must be assigned to the active model and the active planning version- model 000 and planning version 000 respectively. In production system all master data that you transfer from SAP R/3 is automatically assigned to the active model and the active planning version.
To create, copy and delete model and planning version, you have to navigate to following path in SAP SCM system,
Advanced Planning and Optimization → Master Data → Planning Version Management → Model and Version Management
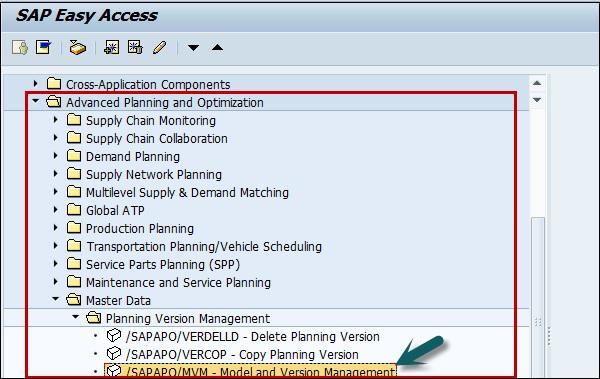
Creating Model
In SAP SCM model, you can assign master data like products, resources to the model that has been created in system.
Step 1 − To create a model → Create Model/planning version → Create Model
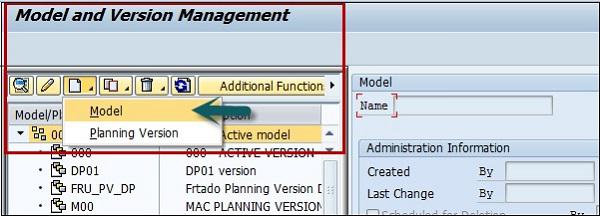
Step 2 − To create a Planning version, select Planning version.

Step 3 − Copy Model/Planning Version: To perform the copying of the planning version/model, you can use the copy option as shown below −

Step 4 − Select the model/version from the list on left side that you want to copy. Click the Copy option at the top and select Model/Version or Model with version.
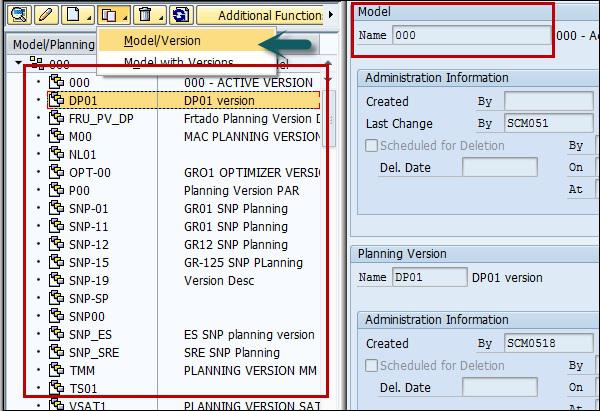
When you select Model/Version option, in the right pane you can see the options to enter the name of Planning version.
You get the different options like −
- Copy master data
- Copy master and transaction data
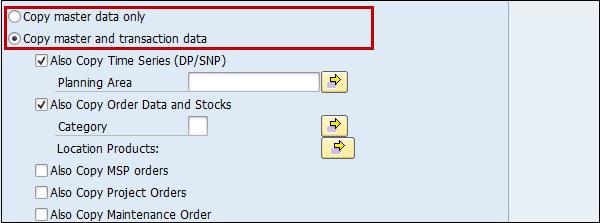
Step 5 − When you make the selection as per requirement, you can click Copy and save button at the bottom.
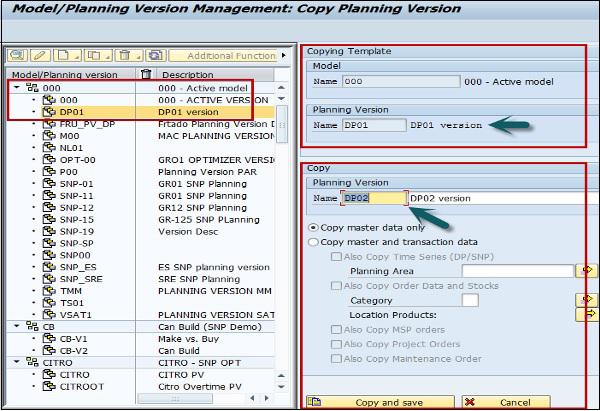
Step 6 − You can create multiple planning versions in a model. When you click Copy and save option, you get the following screen.
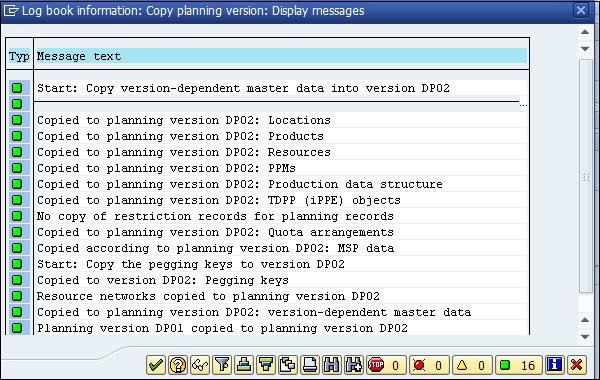
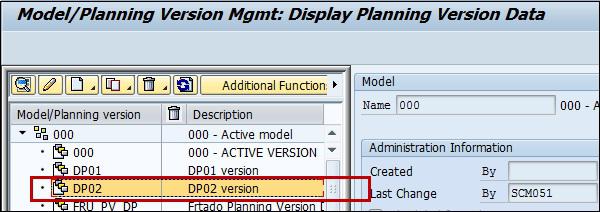
Step 7 − When you click the tick mark at the bottom, you can see that a version has been created under the model you have selected.
Delete Model/Planning Version
You can also delete model/planning version, if you have the authorization to delete. When a model is deleted, it also removes all the planning versions that has been created for this model.
Step 1 − To delete a model/version, click the delete button at the top.

Step 2 − Select the version you want to delete. Select Delete Object from the drop-down list.
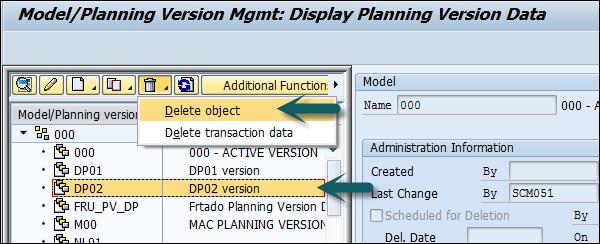
Step 3 − You can select the following options for deletion −
- Schedule for deletion
- Delete immediately
Once you make the selection, click Deletion/Schedule button as shown below −
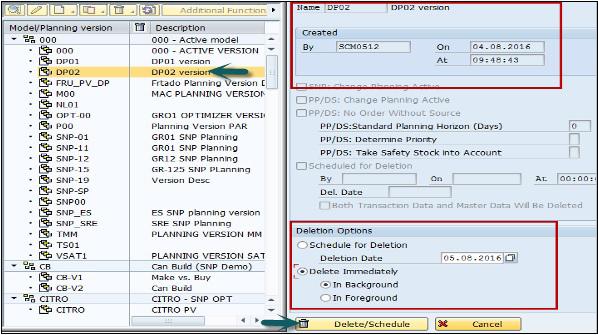
Step 4 − Click Yes for the confirmation and a background program will start.

Step 5 − Click the tick mark and you can see the object has been removed.
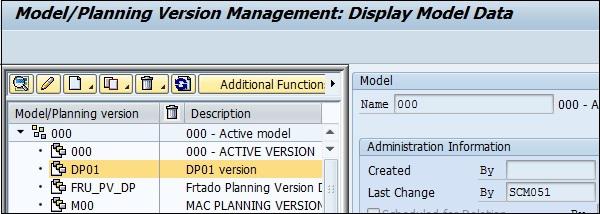
Note − Copying and deletion of models or planning versions can be performed either in the foreground or in the background.
When you perform the task in the foreground it displays the copy log, and the copies are added in the left-hand area of the screen.
When the activity is performed in the background, a mail has been sent that deletion process/copy process is completed and object is removed.
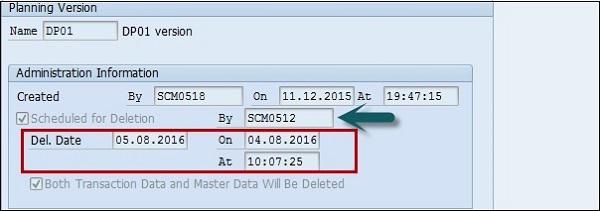
You can use the following transactions/reports to manage models and version −
/SAPAPO/OM_REORG_DAILY − This can be used to delete the planned deletion of models and versions.
/SAPAPO/RLCDELETE − This can be used to delete transactional data of a planning version, an SNP report which deletes orders of selected ATP categories in a planning version.
/SAPAPO/TS_LCM_REORG
/SAPAPO/OM17 − This can be used to check inconsistency of stocks and location products.
/SAPAPO/DM_PEGKEY_REORG − This can be used for reorganization and removal of //PEGKEY inconsistencies.


