In this chapter, we will learn about multilingual content. That means your content can be written and will be displayed in different languages. For this you may either install a multilingual content module or an Internationalism module.
Following are the steps to install multilingual content module on Drupal.
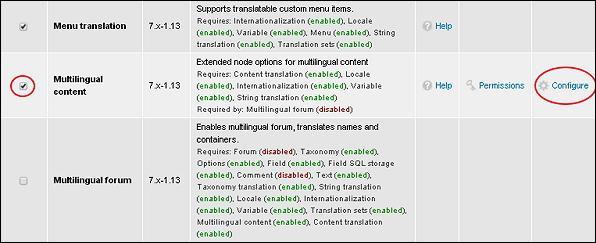
Step 1 − Click Modules from the menu bar.
Step 2 − Check the Multilingual content box from the modules and click Configure.
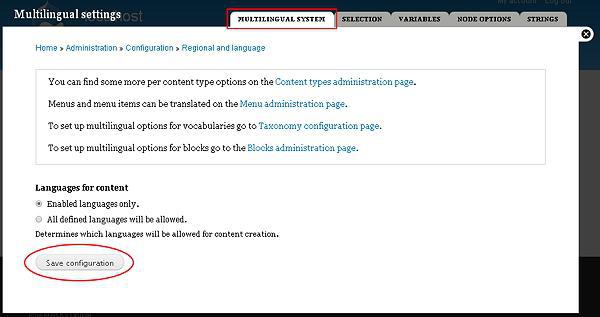
Step 3 − The Multilingual settings page will get displayed.
Enabled language only − When you check this box, you can only view languages that are enabled.
All Defined languages will be allowed − Only the defined languages will be allowed.
Here, we have three different tabs where you can make the required changes.
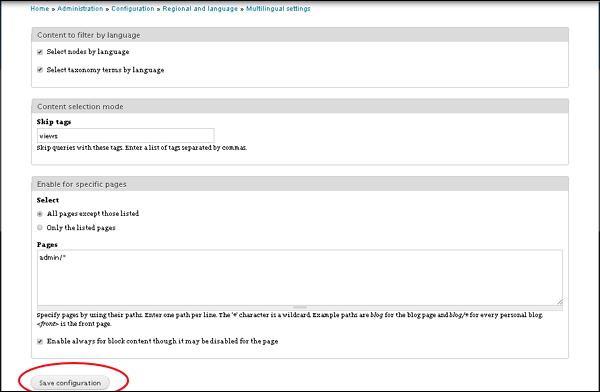
Selection − You can select nodes and taxonomy according to language.
Select nodes by language − Check box if you want nodes by language.
Select taxonomy terms by language − If you want taxonomy terms by language then check this box.
Skip tags − Write those tags which you don't want to include.
Enable for specific pages − If you want to enable settings for specific pages then use this checkbox.
Click the save button, once completed.
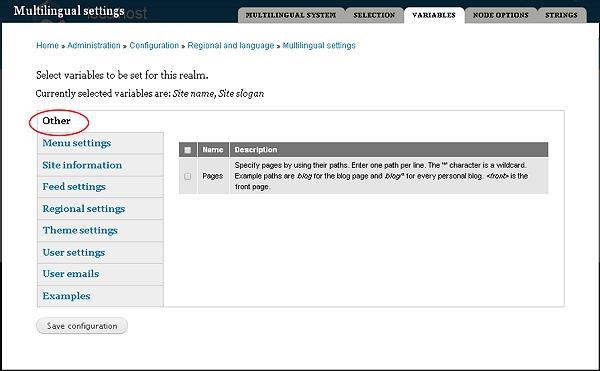
Variables − Select variables to be set as shown in the following screen.
Menu Settings − Manages menu settings.
Site Information − Helps to make changes on site.
Feed settings − You can set your feed description.
Regional Settings − Changes time zone and day.
Theme Settings − Specifies managing themes.
User Settings − You can use this to set users.
User emails − Any issues related to user emails can be done.
Examples − You can give examples.
Click Save when you complete the settings.
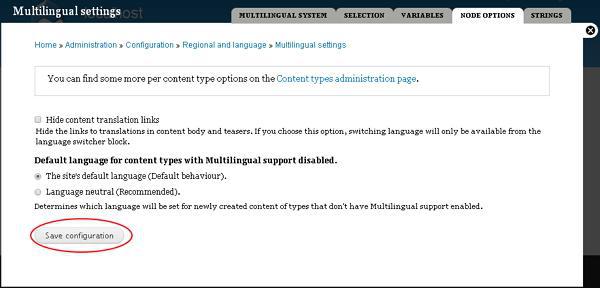
Node Options − Help you set nodes.
You can hide content translations and change the language on this page. Later, click the Save configuration button.
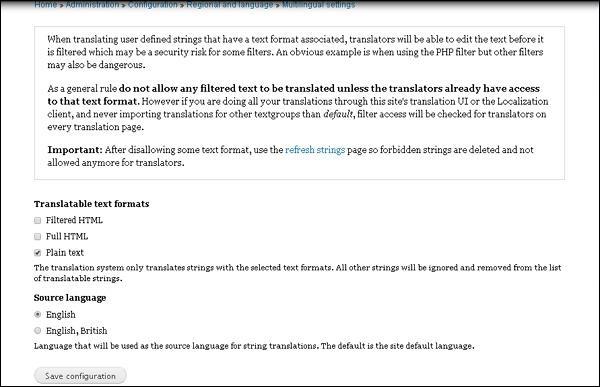
Change and translate strings using Translatable text formats settings. You can even change sources as you choose many languages. After completion, click Save button.