In the previous chapter, you have seen the installation of Vaadin on your local system. In this chapter let us start by creating our first application using Vaadin. Recall that we are using Eclipse IDE in this tutorial.
To start creating your first application in Vaadin, open Eclipse IDE in your local system and follow the steps given below −
Step 1 − On the File menu, Click New and then click Other. Refer to the following screenshot for better understanding.
Step 2 − Now, type Vaadin in the search box and you can see options as shown in the following screenshot. Now, select Vaadin 8 from the options and click Next.
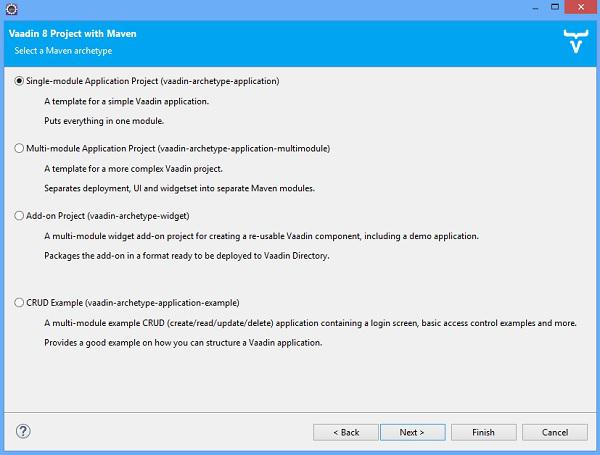
Step 3 − You can see a window with four options as shown below. Select the first option and proceed to the next step.
Step 4 − Next, you can see a screen as shown in the screenshot below. Provide the Group Id and Artifact Id and select Finish. This completes the project and Eclipse will create Vaadin for you.
Please note that this step might take some time as it requires the configuration settings. The artefact id is the name of the current project. We have named it as MyFirstApp.
Step 5 − Now, you can find the directory structure of the automated Vaadin project as shown below −
Step 6 − Your first Vaadin application is ready. Run the project in any application server. Once it is ready you can find your screen as shown below −
Step 7 − Enter any text in the text box and click on the Click Me button. You can observe the output as shown −
Congratulations! You have successfully created your first Vaadin application.