In this chapter, we will discuss in detail about the use of Form Graphics in SAP Smart Forms. This chapter will cover aspects like Previewing Graphics, Importing Graphics and Transporting Graphics.
You can add different graphics in a smart form like the Company Logo, Background Graphics, etc. You can use the graphic node to display graphics in a smart form and by adding node type graphics in the tree structure.
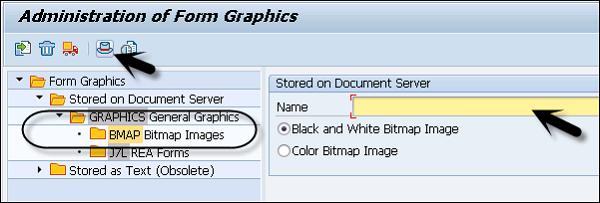
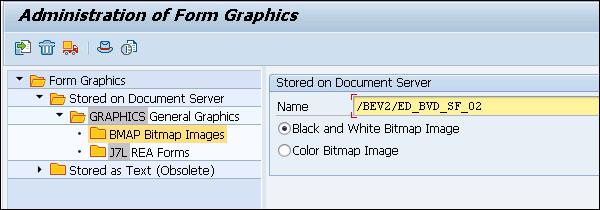
To view the graphics in a SAP System, use Transaction SE78. This will open the Administering Form Graphics dialog box. On the left side, double click on the folder Store on the Document Server → Graphics → BMAP Bitmap Image.
Select the Graphic and click on the Screen Information.
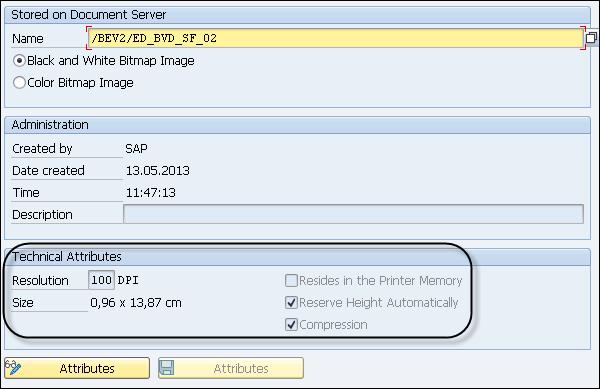
When you click on the Screen information button, it displays the technical attributes and the administrative data of the graphic in a SAP System.
To include background graphics, use the Background Graphic node of a page node. You can use Transaction SE78 to import the graphics into the SAP System.
To import graphics, double-click on a graphic format in the tree structure in the folder Store on the Document server → GRAPHICS → General graphics.
To import, select Graphics → Import.
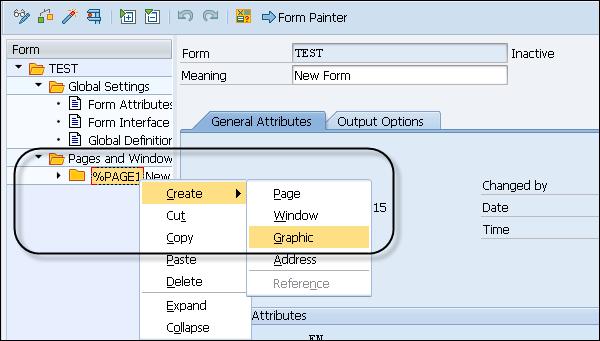
To use the graphics in a Form Builder, go to navigation tree on the left side and create a node type → Graphic.
A graphic node can be created directly under the Page node or you can use the context menu in a layout to place the graphic node.
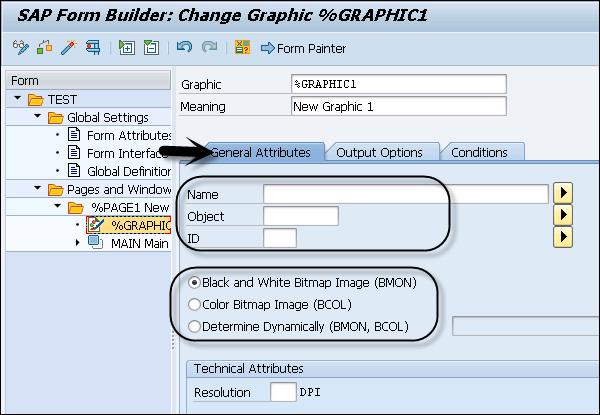
Enter the unique name for the node and description.
On the General Attribute tab → you can include a colored graphic or a graphic in black and white. You can enter the fields Object, ID and Name to identify the graphic.
Under Technical Attributes, you can define Resolution as per the printer settings. When you use a small resolution, it increases the size of graphic on the form.
The printer drivers or printers support the following resolutions −
In a SAP System, it is possible to transport the graphics from one system to another system. Go to Transaction SE78 and there you can select the Transport option to move the graphics from one system to another.
Transaction: SE78 will open the Administering Form Graphics.
This will open the Administering Form Graphics and select the desired graphics in the tree.
Select Graphics → Transport button and then you should enter the workbench request.
You can use an existing request or create a new request to perform the Transport and then click on Continue.