In this chapter, we will be covering some basic mapping and you know that from the last chapter that we have the database table as well as the C# class definition. We now need a mapping that explains how to translate from C# to the database and back again.
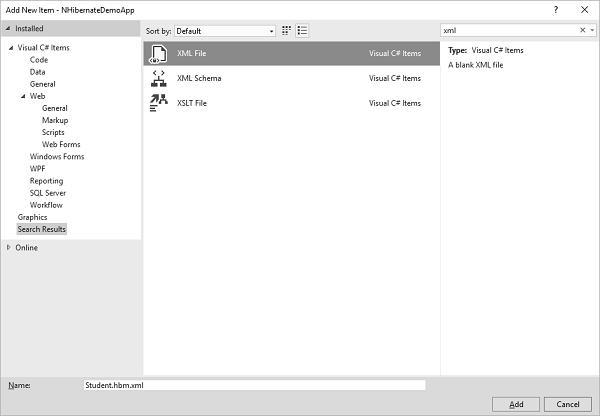
So let’s go ahead and add a new XML file by right clicking on the project in the solution explorer and select Add → New Item...
Enter Student.hbm.xml in the name field. We need to specify a default assembly which is going to be NHibernateDemoApp and also specify a default namespace. This just shortens up a lot of the other type definitions that we're going to making in this file.
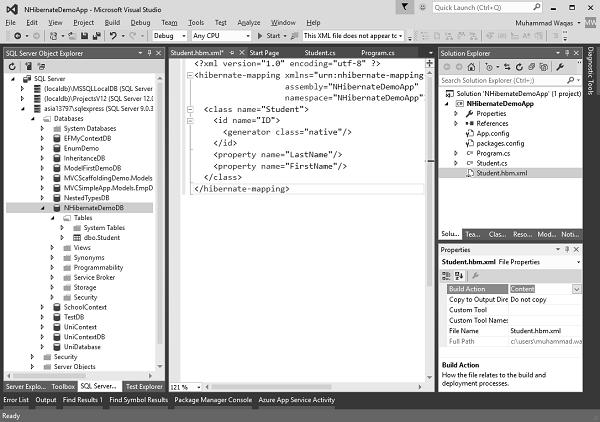
Following is the implementation in the XML file −
<?xml version = "1.0" encoding = "utf-8" ?> <hibernate-mapping xmlns = "urn:nhibernate-mapping-2.2" assembly = "NHibernateDemoApp" namespace = "NHibernateDemoApp"> <class name = "Student"> <id name = "ID"> <generator class = "native"/> </id> <property name = "LastName"/> <property name = "FirstMidName"/> </class> </hibernate-mapping>
The next thing we need to define a class; this class is going to be our Student class. Next, we need to tell NHibernate the name of the id, which is ID and I also have to tell NHibernate how to generate ID’s, so our generator is going to be of type native.
The native type generator means that in a database like SQL Server, it's going to use the identity column, the identity type.
The next thing we have to do is to give the names of the properties. So, add two more properties for the FirstName, and LastName.
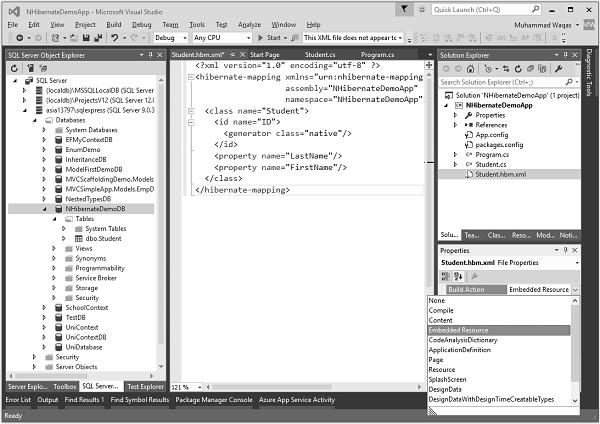
Now, we are reading these mapping files from the assembly. So the preferred way of doing this is to have these HBM files baked into your assembly. We can do this by simply setting a property.
Now right click on the project in the solution explorer and select Properties, you will see the Build Action field in which the Content is selected by default.
Select the embedded resource from the dropdown list.
So this actually embeds that XML file inside of the NHibernateDemoApp assembly.