Microsoft Dynamics CRM - Searching
Microsoft Dynamics CRM is a vast product which has evolved significantly over the years. The product comes with a lot of out-of-the-box functionalities that are inbuilt in the system. You do not need to write any code for utilizing these features. One of the important out-of-the-box features is the searching capability of CRM, in that it supports advanced querying and filtering capabilities.
Quick Search
By default, the grid view of every entity in CRM supports a Quick Search functionality using a search bar on top right. Following is a screenshot of quick search on Contact entity.

You can try entering a search string like 'Robert' and it will return all the matching records.
You can prefix the search keyword with * (asterisk) to perform a wildcard search.
Note − When using the web client version of Microsoft Dynamics CRM, Quick Search always searches All Active records irrespective of the view selected.
You can customize the Quick Search (like customizing any other View) to modify the filter criteria, configure sorting, add view columns, add find columns and change other properties.
Advanced Search
Advanced Search allows you to search records of any entity in CRM. It is one of the strongest and one of the most useful feature that comes out-of-the-box with CRM. The Advanced Search icon appears on the top ribbon bar of Microsoft Dynamics CRM irrespective of which screen you are on.

Click the Advanced Find icon to open the Advanced Find window. This window will allow you to select the entity for which you want to search records, apply filtering and grouping criteria, and save your Advanced Find views as personal views.
Let’s take an example. Suppose, you want to search for all the Contacts with FirstName containing Robert and who are Divorced. For this −
Step 1 − Select Contacts from the Look for dropdown. This dropdown will contain all the entities present in your system.
Step 2 − Enter the search criteria as shown in the following screenshot. You can add as many search query parameters as you want. You can even group such criteria using group parameters. For example, if you would like to search all contacts whose first name is either Robert or Mark, you can add two search criteria and group them using GroupOR.

Step 3 − Click the Results button. It will show the matched records in a new tab.

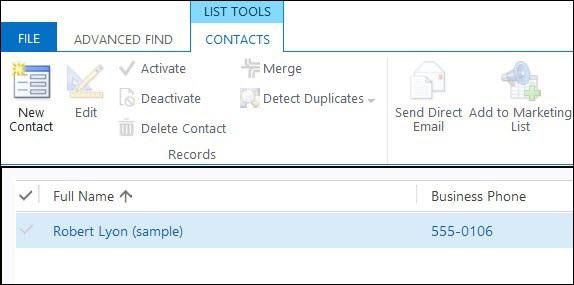
Step 4 − You can also edit the columns that you would like to see in the search results by clicking Edit Columns. For example, our current grid contains only two columns – Full Name and Business Phone. However, if you would like to have an additional column of Email ID added to this grid, you can do so using this option.
Saving Custom View
At this stage, if you would like to save this search criteria, along with the filters and edited columns, you can do so by clicking the Save button. Once saved, you can use this saved view when you are on that entity page.

For example, consider that as a customer executive you serve two types of customers: Normal and Premium. Hence, you can create an advanced filter with these respective categories and save them as Normal Contacts Assigned to Me and Premium Contacts Assigned to Me. You can then quickly access these views directly from the Contact entity page without carrying out a quick search or an advanced find search every time you use the system.


