Continuous Integration - Building a Solution


Advertisements

There are a variety of build tools available for a variety of programming languages. Some of the most popular build tools include Ant for Java and MSBuild for .NET. Using a scripting tool designed specifically for building software, instead of a custom set of shell or batch scripts, is the most effective manner for developing a consistent, repeatable build solution.

So why do we need a build process to start with. Well for starters, for a Continuous Integration server, the build process should be easy to work with and should be seamless to implement.

Let’s take a simple example of what a build file can look like for .Net −

<?xml version = "1.0" encoding = "utf-8"?>
<project xmlns = "http://schemas.microsoft.com/developer/msbuild/2003">
   <Target Name = "Build">
      <Message Text = "Building Project" />
      <MSBuild Projects = "project.csproj" Targets = "Build/>"
   </Target>
</project>

The following aspects need to be noted about the above code −

  • A target is specified with a name of the Build. Wherein, a target is a collection of logical steps which need to be performed in a build process. You can have multiple targets and have dependencies between targets.

  • In our target, we keep an option message which will be shown when the build process starts.

  • The MSBuild task is used to specify which .Net project needs to be built.

The above example is a case of a very simple build file. In Continuous Integration, it is ensured that this file is kept up-to-date to ensure that the entire build process is seamless.

Building a Solution in .Net

The default build tool for .Net is MSBuild and is something that comes shipped with the .Net framework. Depending on the framework on your system, you will have the relevant MSbuild version available. As an example, if you have the .Net framework installed in the default location, you will find the MSBuild.exe file in the following location −

C:\Windows\Microsoft.NET\Framework\v4.0.30319

Let’s see how we can go about building our sample project. Let’s assume our Sample project is located in a folder called C:\Demo\Simple.

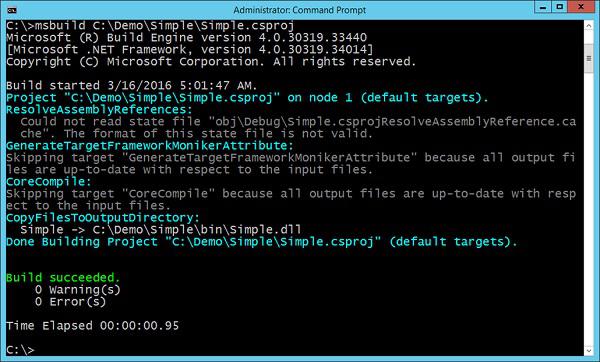
In order to use MSBuild to build the above solution, we need to open the command prompt and use the MSBuild option as shown in the following program.

msbuild C:\Demo\Simple\Simple.csproj

In the above example, csproj is the project file which is specific to .Net. The csproj file contains all the relevant information to ensure that the required information is present for the software to build properly. Following is the screenshot of the output of the MSBuild command.

MS Build Command

You don’t need to worry about the output warnings as long as the Build was successful and there were no errors.

Advertisements