In this chapter, we will study how to Add users to your WordPress blog or website. When users register on your WordPress blog or website, you get an e-mail notification, so you always know when new users register, and you can then get into your Dashboard and edit the users’ role.
Following are the simple steps to Add Users in WordPress.
Step (1) − Click on Users → Add New in WordPress.
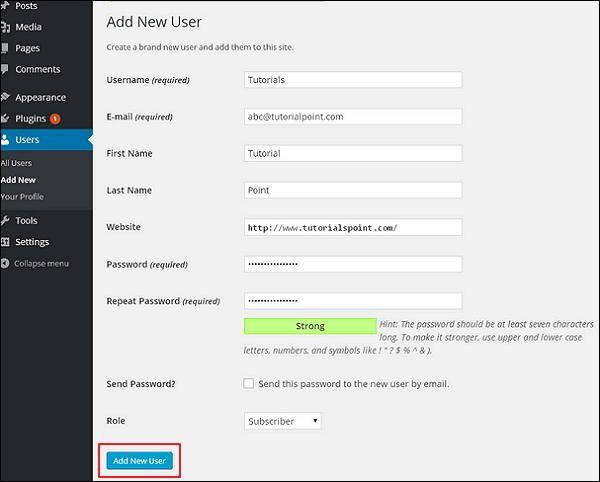
Step (2) − You can fill the user detail on the Add New User page. Fill in all the required fields (as seen in the following screen) to proceed further.
Username (required) − Enter the unique username, which you want to display on website.
E-mail (required) − Enter the valid e-mail address. The user receives notifications from the site at this e-mail address.
First Name − Enter the user’s first name.
Last Name − Enter the user’s last name.
Website − Enter the URL for the user’s website.
Password (required) − Enter the password.
Repeat Password (required) − Repeat the same password as the previous password for authentication.
Send Password − Send password to the New User by e-mail checkbox. The user will receive an e-mail with the new password.
Role − Select the particular role from the dropdown, i.e., Subscriber, Contributor, Author, Editor, or Administrator.
Click on Add New User button to add user to your users list.
Step (3) − You can view the user list to see whether the users have been added. A message will be displayed as New User Created as seen in the following screen.