Silverlight - Out-of-Browser Applications
We are now going to explore Silverlight support for applications that can be installed on the end-user's machine to run outside of the web browser like a normal Windows application. There are three main reasons you might want your application to be able to run out-of-browser −
- Interaction
- Offline
- Elevated Trust
Interaction
It may enable better interaction design. A navigation model of the web is not a particularly good fit for some applications. For example, the Address bar and Back button may be a waste of space, and useless.
Importance of Silverlight here is as given below −
Web applications can use client-side technologies, such as Silverlight, Flash, or AJAX to provide continuous updates to a single page, perhaps removing any need to navigate to other pages.
In some applications, a user can spend many minutes, or even hours on what the browser considers to be a single page.
For this sort of application, the Back button can end up having a rather surprising effect of exiting the application because it will dump you back at whatever page you were on before you went into the application.
Distinctly, non-web-like applications are usually better served by running out of the browser, because that gets rid of the browser Chrome. Generally, usability is not the only reason for running out of browser.
Offline
Another reason to use this feature is to enable offline execution. When a Silverlight application is installed for out-of-browser operation, it is copied to a per user repository on the local machine and becomes available through the usual operating system mechanisms for launching applications, like the Start menu on Windows, for example.
The application will then be available even if the user does not have internet connectivity.
Obviously, this is only helpful for applications that do not depend wholly on the server-side information.
For example, an auto-tracking application for a parcel delivery service would not be of much use without the network connectivity.
For some applications, the ability to continue working during occasional connectivity failures is very helpful.
Elevated Trust
Silverlight's version 4 added support for trusted applications. Silverlight's security sandbox normally blocks certain privileged operations, such as accessing the user's files.
However, an out-of-browser application may request elevation. If the user grants that request, the application is able to do more of the kind of work any normal Windows application will be able to do, such as making use of COM Automation, or customizing the window border.
Applications that run inside the browser are never trusted, so you have to write an outof-browser application if you want to use these features.
Enabling OOB
How do we write an out-of-browser application? It is very easy. We have to change a single setting in the project properties of Silverlight and it just adds a suitable setting to the AppManifest.xaml.
Let us see how it works.
When your manifest indicates that out-of-browser execution is supported, this has no initial effect. The application will run in the browser as usual.
However, if the user right clicks, the standard Silverlight ContextMenu offers an extra item to install the application on the computer.

If the user selects that item, a dialog box appears asking for confirmation. It also asks whether the application should be accessible from the Start menu, the Desktop, or both.
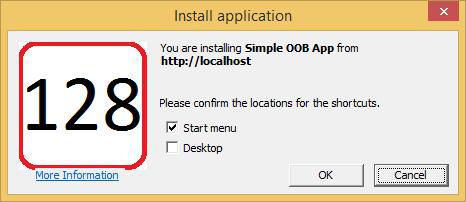
You do not have to rely on the context menu. You could also offer a button that the user can click to install the application, because there is an API, you can call to initiate installation.
When you kick off the installation programmatically, the user still sees the dialog box. You cannot install your app without the user consent.
A Silverlight Application
Here is a very simple Silverlight application. Given below is its XAML code.
<UserControl x:Class = "SimpleOob.MainPage"
   xmlns = "http://schemas.microsoft.com/winfx/2006/xaml/presentation"
   xmlns:x = "http://schemas.microsoft.com/winfx/2006/xaml"
   xmlns:d = "http://schemas.microsoft.com/expression/blend/2008"
   xmlns:mc = "http://schemas.openxmlformats.org/markup-compatibility/2006"
   mc:Ignorable = "d"
   d:DesignHeight = "300" d:DesignWidth = "400">

   <Grid x:Name = "LayoutRoot" Background = "White">

      <Border BorderBrush = "Blue" BorderThickness = "4" CornerRadius = "20" >

         <Border.Background>

            <LinearGradientBrush StartPoint = "0,0" EndPoint = "0,1">
               <GradientStop Offset = "0.0" Color = "White" />
               <GradientStop Offset = "0.15" Color = "#cef" />
               <GradientStop Offset = "1.0" Color = "White" />
            </LinearGradientBrush>

         </Border.Background>

         <TextBlock HorizontalAlignment = "Center" VerticalAlignment = "Center"
            Text = "Silverlight Application" TextOptions.TextHintingMode = "Animated"
            TextAlignment = "Center" TextWrapping = "Wrap"
            FontSize = "72" FontFamily = "Trebuchet MS" >

               <TextBlock.Effect>
                  <DropShadowEffect Color = "#888" />
               </TextBlock.Effect>

         </TextBlock>

      </Border>

   </Grid>

</UserControl>
Step 1 − To enable out-of-browser execution, go to the project's Properties, and click the Silverlight tab. All we need to do is − check the Enable running application out of the browser checkbox.
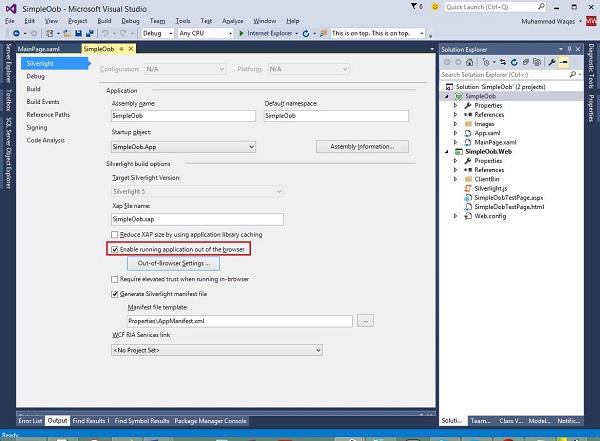
If you run this application, you will notice that you will not get a web browser at all.

In fact, Visual Studio has made a decision on your behalf. When you enabled out-of-browser execution, it unfairly changed your debug settings.
Step 2 − So, here in the Solution Explorer, notice that Silverlight project is now in bold, indicating that it is a startup project.
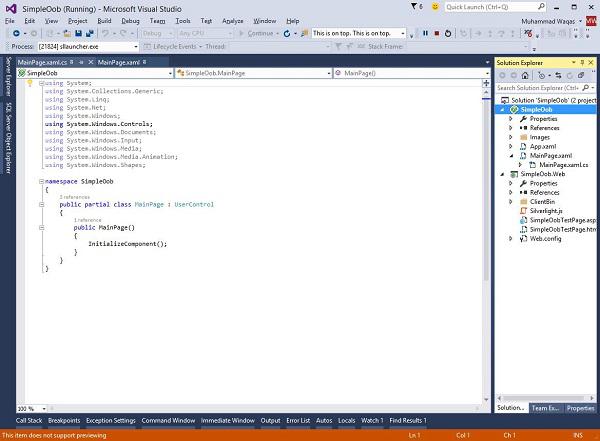
That was not the case before. It had been the web project. Right now, we do not want that, because we want to show how that checkbox changes things for the end user.
Step 3 − We will set the web project back to being the StartUp Project.
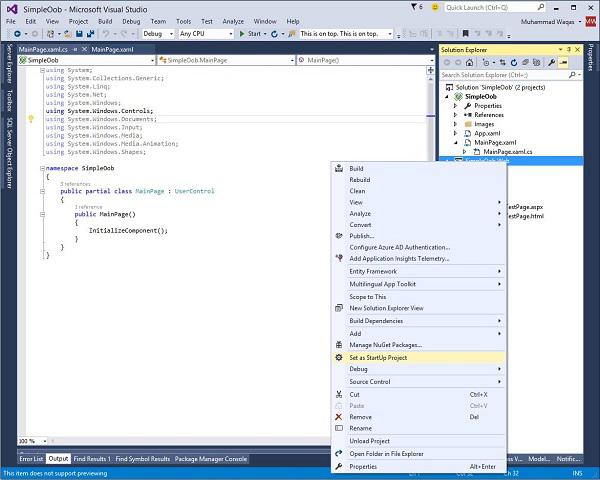
Step 4 − Run the application again, and you will see that the application is back in the browser now.

Step 5 − Right-click the webpage. You will notice the usual Silverlight entry in the context menu, and an extra item to install.
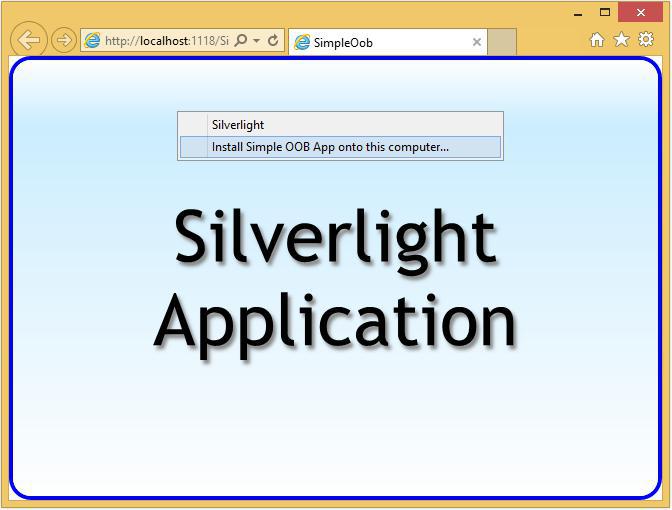
Step 6 − When you select the second option, Install application dialog box appears as shown below.

Notice that it shows the root URL of the website, the application came from. We are using the local debug web server provided by Visual Studio, which is why it says localhost.
Step 7 − Click OK, and the application runs in its own window separate from the browser.

It might be natural to think that this window is somehow owned by, or connected to the browser, but it is not. You can close the browser, and this window stays around. More importantly, you can close this window, and then rerun the application without using the browser at all.
Step 8 − If you open the Search dialog box in the Start menu and start to type the application name, it shows up just like any normal Windows application does.
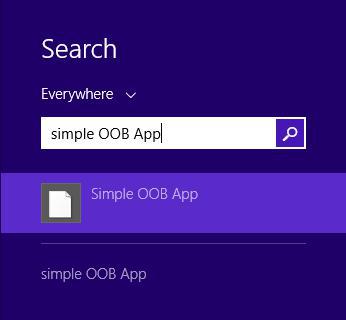
Step 9 − You can run it without the browser being anywhere in sight.

To uninstall the application
The default context menu on the application provides an easy way for doing that. A user could reasonably expect to uninstall this the same way they would any other application.
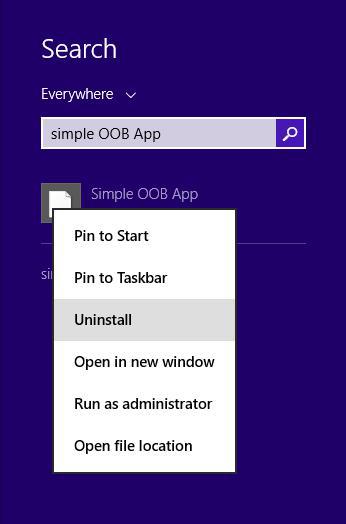
You can also remove by right-clicking on the web page and selecting Remove this application….

OOB Settings
Although we only had to change a single setting to enable out-of-browser operation, in practice, you will normally want to do a bit more than that. The AppManifest.xaml file can contain several settings related to out-of-browser operation, which we usually configure through Visual Studio.
As you may have noticed, when you checked the checkbox to enable running out-ofbrowser, Visual Studio enabled a button labeled Out-of-Browser Settings.
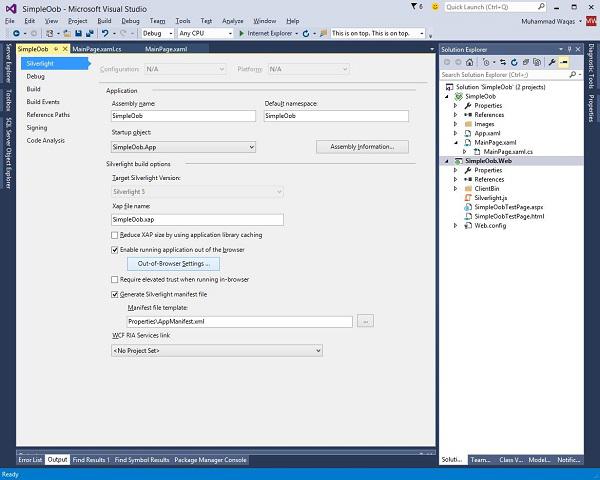
Let us take a look at it by clicking the button. It will produce the following dialog box.
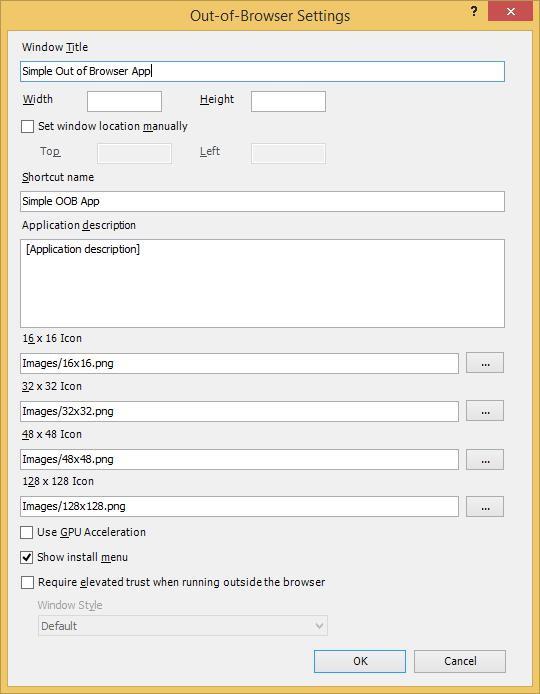
The first thing we can configure is the text that appears as the Window Title.
We also have the option to fix the window dimensions and locations, but we will leave those on automatic for now.
This Shortcut name appears in the Start menu, and the Desktop link for the app once it's installed.
It is also the text that appears in the context menu, and the install application dialog.
This Application description appears in the tool tip when I hover over the shortcuts.
We get to provide icons at various sizes. These have to be built into your project.


