Now that we have already created a sample MVC application, let us understand the folder structure of an MVC project. We will create new a MVC project to learn this.
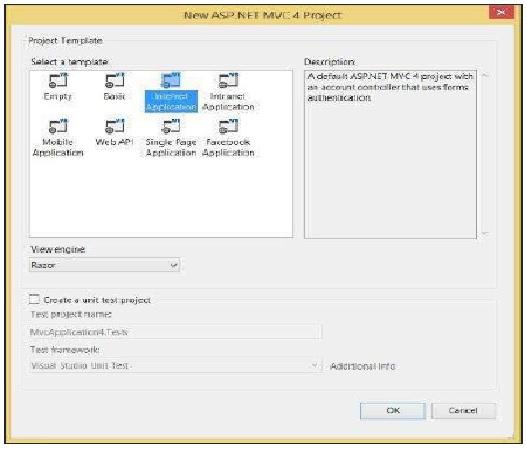
In your Visual Studio, open File → New → Project and select ASP.NET MVC Application. Name it as MVCFolderDemo.
Click OK. In the next window, select Internet Application as the Project Template and click OK.
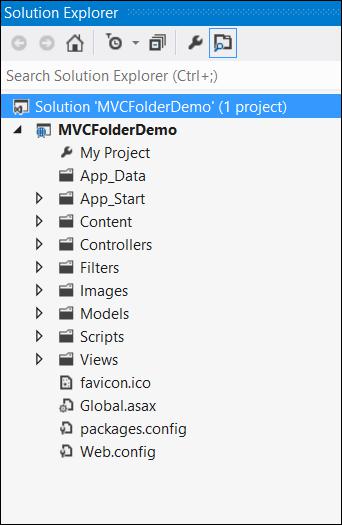
This will create a sample MVC application as shown in the following screenshot.
Note − Files present in this project are coming out of the default template that we have selected. These may change slightly as per different versions.
This folder will contain all the Controller classes. MVC requires the name of all the controller files to end with Controller.
In our example, the Controllers folder contains two class files: AccountController and HomeController.
This folder will contain all the Model classes, which are used to work on application data.
In our example, the Models folder contains AccountModels. You can open and look at the code in this file to see how the data model is created for managing accounts in our example.
This folder stores the HTML files related to application display and user interface. It contains one folder for each controller.
In our example, you will see three sub-folders under Views, namely Account, Home and Shared which contains html files specific to that view area.
This folder contains all the files which are needed during the application load.
For e.g., the RouteConfig file is used to route the incoming URL to the correct Controller and Action.
This folder contains all the static files, such as css, images, icons, etc.
The Site.css file inside this folder is the default styling that the application applies.
This folder stores all the JS files in the project. By default, Visual Studio adds MVC, jQuery and other standard JS libraries.