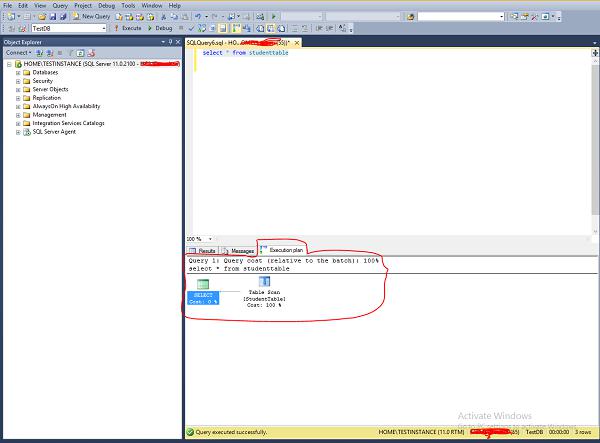
Execution plan will be generated by Query optimizer with the help of statistics and Algebrizer\processor tree. It is the result of Query optimizer and tells how to do\perform your work\requirement.
There are two different execution plans - Estimated and Actual.
Estimated execution plan indicates optimizer view.
Actual execution plan indicates what executed the query and how was it done.
Execution plans are stored in memory called plan cache, hence can be reused. Each plan is stored once unless optimizer decides parallelism for the execution of the query.
There are three different formats of execution plans available in SQL Server - Graphical plans, Text plans, and XML plans.
SHOWPLAN is the permission which is required for the user who wants to see the execution plan.
Following is the procedure to view the estimated execution plan.
Step 1 − Connect to SQL Server instance. In this case, 'TESTINSTANCE' is the instance name as shown in the following snapshot.
Step 2 − Click on New Query option on the above screen and write the following query. Before writing the query, select the database name. In this case, 'TestDB' is database name.
Select * from StudentTable
Step 3 − Click the symbol which is highlighted in red color box on the above screen to display the estimated execution plan as shown in the following screenshot.
Step 4 − Place the mouse on table scan which is the second symbol above the red color box in the above screen to display the estimated execution plan in detail. The following screenshot appears.
Following is the procedure to view the actual execution plan.
Step 1 Connect to SQL Server instance. In this case, 'TESTINSTANCE' is the instance name.
Step 2 − Click New Query option seen on the above screen and write the following query. Before writing the query, select the database name. In this case, 'TestDB' is database name.
Select * from StudentTable
Step 3 − Click the symbol which is highlighted in red color box on the above screen and then execute the query to display the actual execution plan along with the query result as shown in the following screenshot.
Step 4 − Place the mouse on the table scan which is the second symbol above the red color box on the screen to display the actual execution plan in detail. The following screenshot appears.
Step 5 − Click Results which is on the left top corner on the above screen to get the following screen.