This article provides a step-by-step procedure of Gulp installation.
Operating System − Cross-platform
Browser Support − IE (Internet Explorer 8+), Firefox, Google Chrome, Safari, Opera
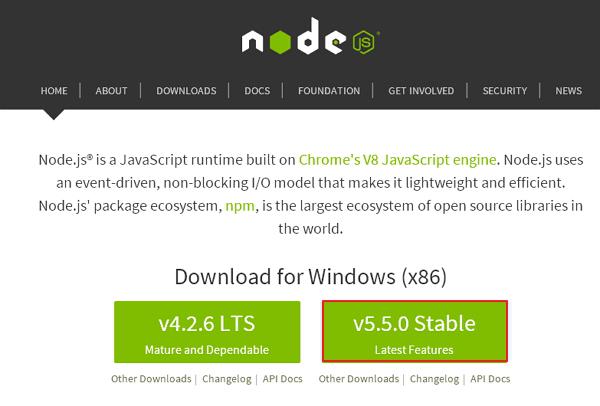
Step 1 − We need Node.js to run Gulp examples. To download Node.js, open the https://nodejs.org/en/, you will see a screen as shown below −
Download the latest features version of the zip file.
Step 2 − Next, run the setup to install the NodeJs on your computer.
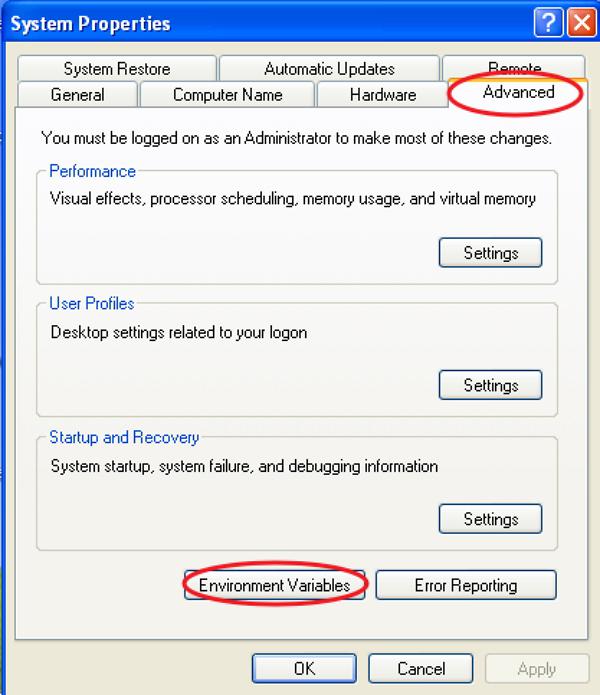
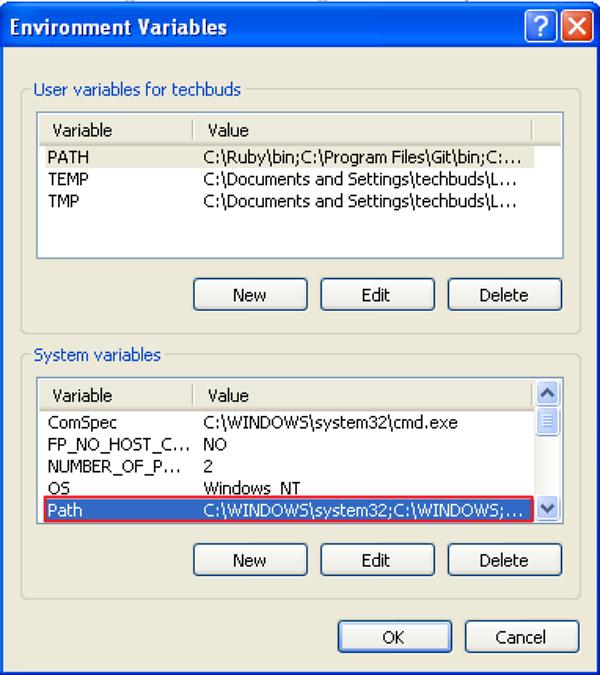
Step 3 − You need to set environment variables.
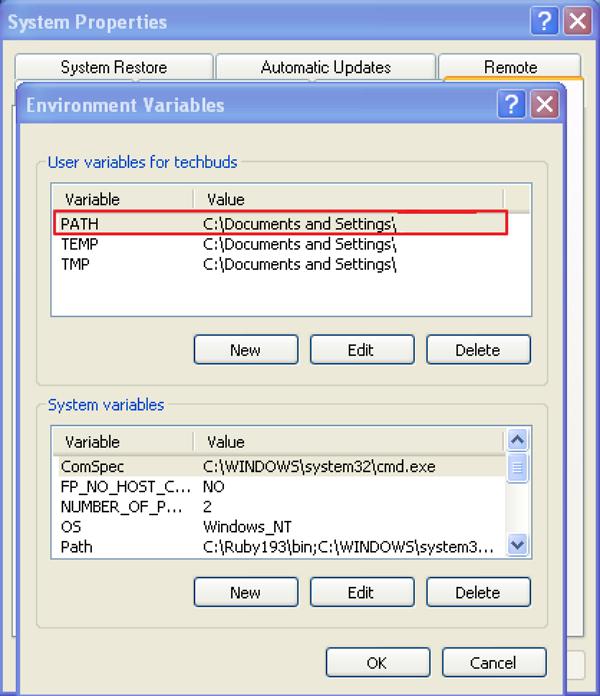
Under Environment Variables window, double-click on the PATH as shown in the following screen.
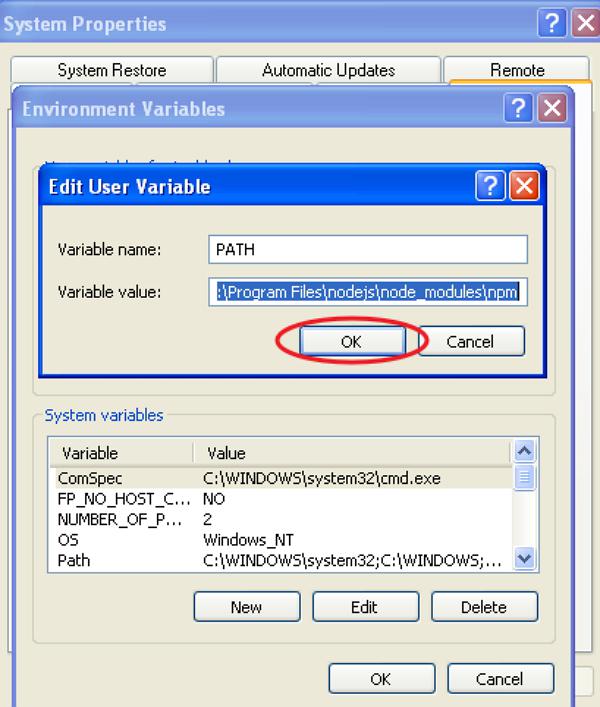
You will get an Edit User Variable window as shown in the following screenshot. Add Node.js folder path in the Variable Value field as C:\Program Files\nodejs\node_modules\npm. If the path is set already for other files, then you need to put a semicolon (;) after that and add the Node.js path as shown in the following screenshot.
At the end, click the ‘Ok’ button.
System Variable
Under System variables, double-click on Path as shown in the following screen.
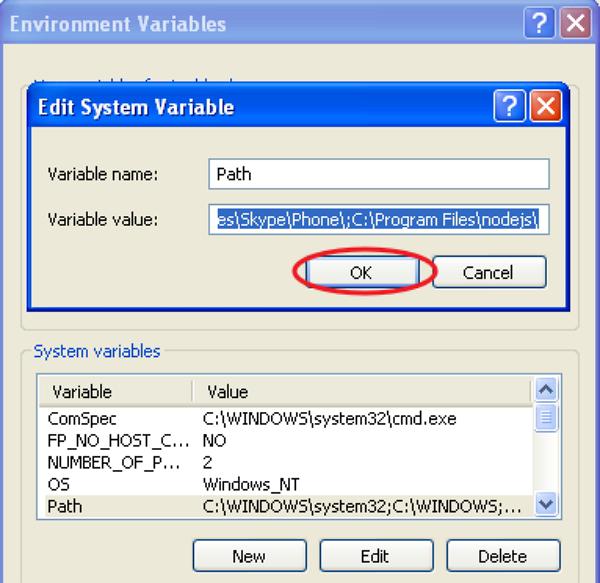
You will get an Edit System Variable window as shown in the following screenshot. Add Node.js folder path in the Variable Value field as C:\Program Files\nodejs\ and click ‘Ok’ as shown in the following screenshot.
Step 4 − Open the command prompt in your system and enter the following command. It will display the installed Node.js version.
node -v
Step 5 − In the command prompt, enter the following command to display the version of npm (Node.js package manager) which is used to install modules. It will display the installed Node.js version.
npm -v
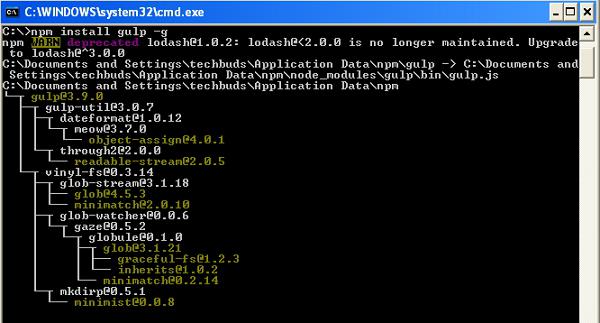
Step 6 − In the command prompt, enter the following command to install Gulp. Adding “-g” flag ensures that the Gulp is globally available for any project.
npm install gulp -g
Step 7 − To verify that Gulp has been installed successfully, enter the following command to display the Gulp version.
gulp -v