Google Colab - Your First Colab Notebook
In this chapter, you will create and execute your first trivial notebook. Follow the steps that have been given wherever needed.
Note − As Colab implicitly uses Google Drive for storing your notebooks, ensure that you are logged in to your Google Drive account before proceeding further.
Step 1 − Open the following URL in your browser − https://colab.research.google.com Your browser would display the following screen (assuming that you are logged into your Google Drive) −
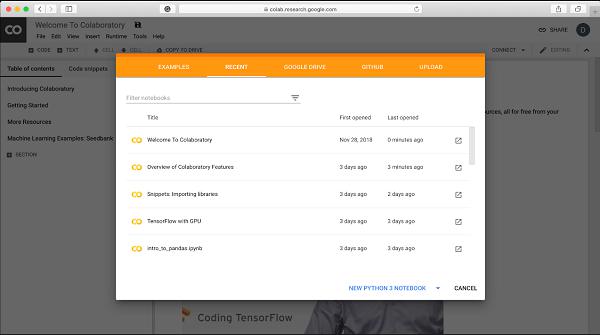
Step 2 − Click on the NEW PYTHON 3 NOTEBOOK link at the bottom of the screen. A new notebook would open up as shown in the screen below.
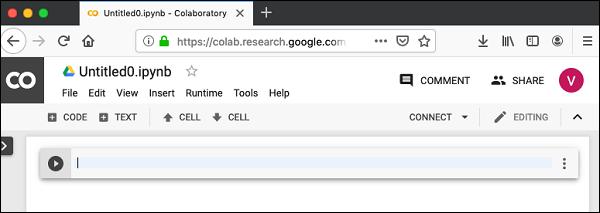
As you might have noticed, the notebook interface is quite similar to the one provided in Jupyter. There is a code window in which you would enter your Python code.
Setting Notebook Name
By default, the notebook uses the naming convention UntitledXX.ipynb. To rename the notebook, click on this name and type in the desired name in the edit box as shown here −
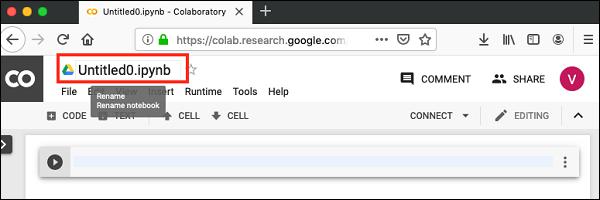
We will call this notebook as MyFirstColabNotebook. So type in this name in the edit box and hit ENTER. The notebook will acquire the name that you have given now.
Entering Code
You will now enter a trivial Python code in the code window and execute it.
Enter the following two Python statements in the code window −
import time
print(time.ctime())
Executing Code
To execute the code, click on the arrow on the left side of the code window.
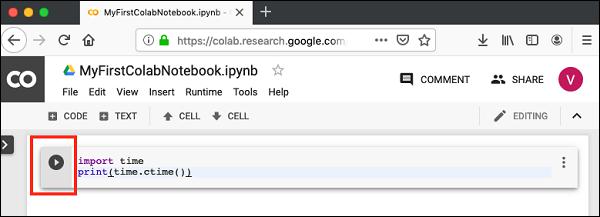
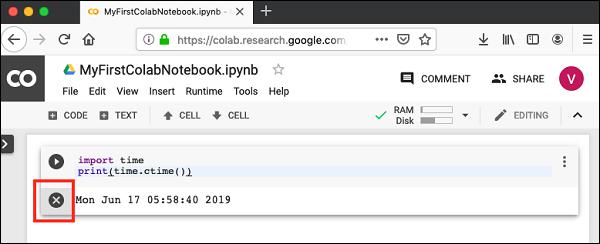
After a while, you will see the output underneath the code window, as shown here −
Mon Jun 17 05:58:40 2019
You can clear the output anytime by clicking the icon on the left side of the output display.
Adding Code Cells
To add more code to your notebook, select the following menu options −
Insert / Code Cell
Alternatively, just hover the mouse at the bottom center of the Code cell. When the CODE and TEXT buttons appear, click on the CODE to add a new cell. This is shown in the screenshot below −
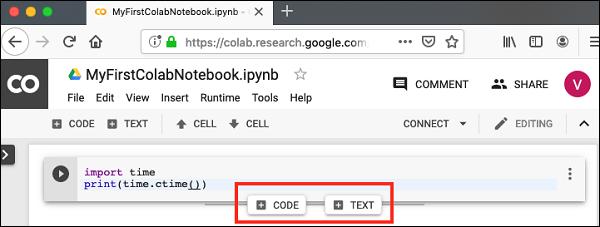
A new code cell will be added underneath the current cell. Add the following two statements in the newly created code window −
time.sleep(5)
print (time.ctime())
Now, if you run this cell, you will see the following output −
Mon Jun 17 04:50:27 2019
Certainly, the time difference between the two time strings is not 5 seconds. This is obvious as you did take some time to insert the new code. Colab allows you to run all code inside your notebook without an interruption.
Run All
To run the entire code in your notebook without an interruption, execute the following menu options −
Runtime / Reset and run all…
It will give you the output as shown below −
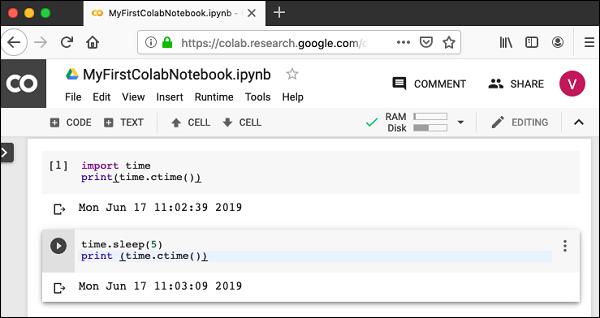
Note that the time difference between the two outputs is now exactly 5 seconds.
The above action can also be initiated by executing the following two menu options −
Runtime / Restart runtime…
or
Runtime / Restart all runtimes…
Followed by
Runtime / Run all
Study the different menu options under the Runtime menu to get yourself acquainted with the various options available to you for executing the notebook.
Changing Cell Order
When your notebook contains a large number of code cells, you may come across situations where you would like to change the order of execution of these cells. You can do so by selecting the cell that you want to move and clicking the UP CELL or DOWN CELL buttons shown in the following screenshot −

You may click the buttons multiple times to move the cell for more than a single position.
Deleting Cell
During the development of your project, you may have introduced a few now-unwanted cells in your notebook. You can remove such cells from your project easily with a single click. Click on the vertical-dotted icon at the top right corner of your code cell.
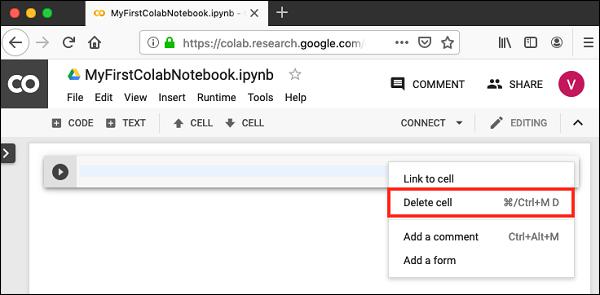
Click on the Delete cell option and the current cell will be deleted.
Now, as you have learned how to run a trivial notebook, let us explore the other capabilities of Colab.


