.NET Core - Testing Library
In this chapter, we will test our StringLibrary and to do so, we need to rearrange our projects so that we can follow the default convention.
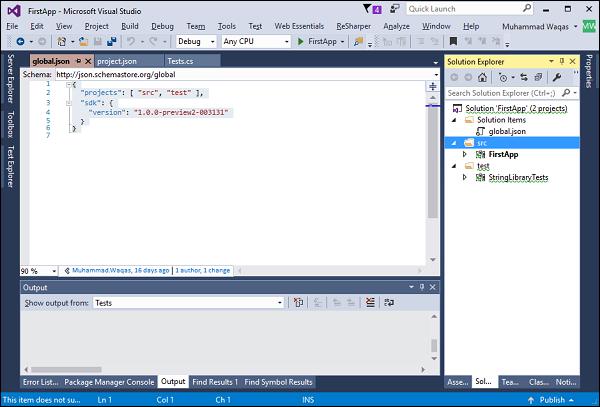
Let us open the global.json file.
{
   "projects": [ "src", "test" ],
   "sdk": {
      "version": "1.0.0-preview2-003131"
   }
}
At the top of this file you will see the project settings and it sets up some folder such as src and test by default.
As by convention we must have projects in these folders, this is the new convention and that is going to be used as part of .NET Core.
In the Solution Explorer, you can see that both the console project and the library project are inside the src folder while the Testing project is inside test folder.
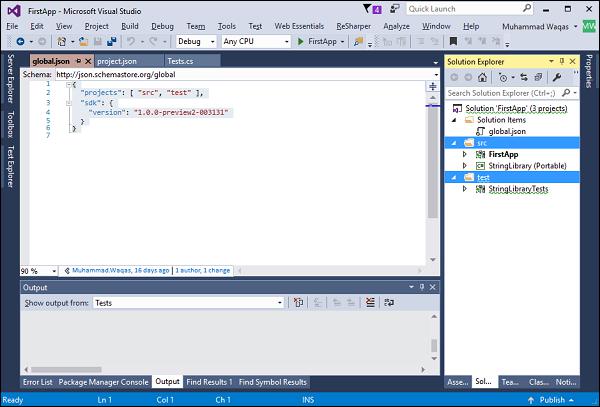
And the projects structure in Solution Explorer doesn’t represent where the projects physically exist on the disk. Let us now open the Solution folder and you will see that StringLibrary project is not inside the src folder.
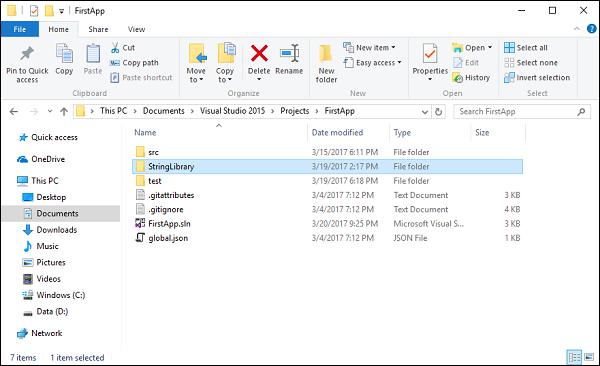
You can see that both src and test folders map to the convention specified in the global.json file. However, we have one project StringLibrary which is out of convention. Let us now add the StringLibrary project inside the src folder.
In the src folder, we have two projects and we need to fix the problem so that we can use all the projects properly. Let us go back to the Visual Studio and right-click on the StringLibrary project and select the Remove option. It won’t delete it, but it will only remove the project.
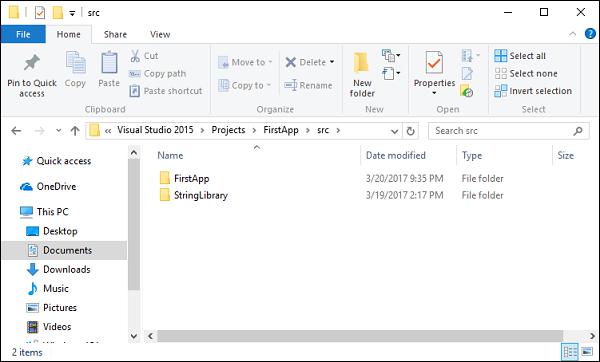
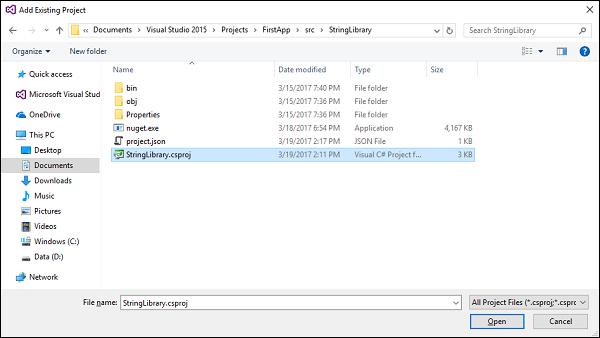
Now right-click on the src folder and select Add → Existing Project…
Browse to the StringLibrary project which is now inside the src folder, select the StringLibrary.csproj file and click Open.
We now have to remove the reference of StringLibrary from the project.json file of the console app.
{
   "version": "1.0.0-*",
   "buildOptions": {
      "emitEntryPoint": true
   },
   "dependencies": {
      "Microsoft.NETCore.App": {
         "type": "platform",
         "version": "1.0.1"
      },
      "NuGet.CommandLine": "3.5.0",
      "System.Runtime.Serialization.Json": "4.0.3"
   },
   "frameworks": {
      "netcoreapp1.0": {
         "dependencies": { },
         "imports": "dnxcore50"
      }
   }
}
Save the changes and then add a reference of StringLibrary again in your console project.
{
   "version": "1.0.0-*",
   "buildOptions": {
      "emitEntryPoint": true
   },
   "dependencies": {
      "Microsoft.NETCore.App": {
         "type": "platform",
         "version": "1.0.1"
      },
   "NuGet.CommandLine": "3.5.0",
      "System.Runtime.Serialization.Json": "4.0.3"
   },
   "frameworks": {
      "netcoreapp1.0": {
         "dependencies": {
            "StringLibrary": {
               "target": "project"
            }
         },
         "imports": "dnxcore50"
      }
   }
}
Now everything should be working again and you can build StringLibrary and then FirstApp (console project) without any error. Let us now test the StringLibrary functionality using xunit. We need to add reference of StringLibrary into our testing project. Right-click on the References of StringLibraryTests project and select Add Reference…

Click OK which will add a reference of StringLibrary to our testing project. Let us now replace the following code in the Tests.cs file.
using System;
using Xunit;
using StringLibrary;

namespace Tests {
   public class Tests {
      [Fact]
      public void StartsWithUpperCaseTest() {
         string input = "Mark";
         Assert.True(input.StartsWithUpper());
      }
      [Fact]
      public void StartsWithLowerCaseTest() {
         string input = "mark";
         Assert.True(input.StartsWithLower());
      }
      [Fact]
      public void StartsWithNumberCaseTest() {
         string input = "123";
         Assert.True(input.StartsWithNumber());
      }
   }
}
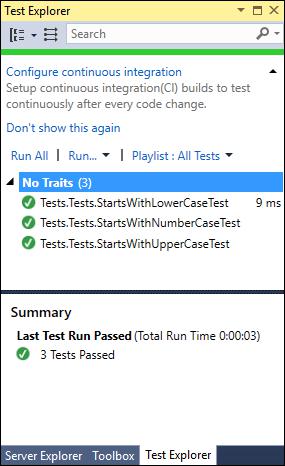
You can see that we have three test methods which will test the functionality of StringLibrary. Let us click the Run All link and you will see the following output in Test Explorer.
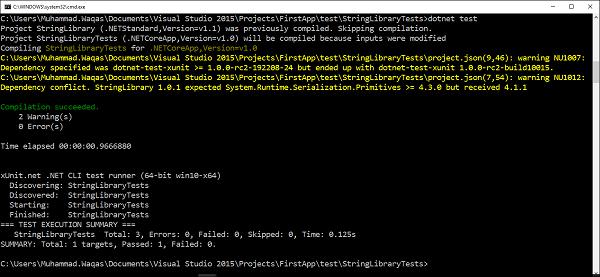
You can also run the tests from the command line. Let us open the command prompt and execute the dotnet test command.
