DocumentDB - Insert Document
In this chapter, we will get to work with actual documents in a collection. You can create documents using either Azure portal or .Net SDK.
Creating Documents with the Azure Portal
Let’s take a look at the following steps to add document to your collection.
Step 1 − Add new collection Families of S1 pricing tier in myfirstdb.
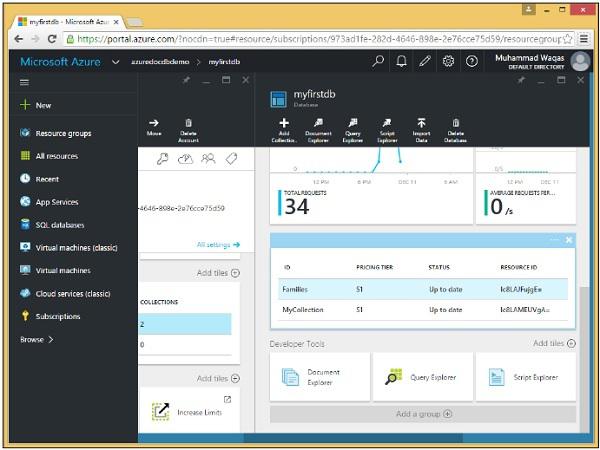
Step 2 − Select the Families collection and click on Create Document option to open the New Document blade.
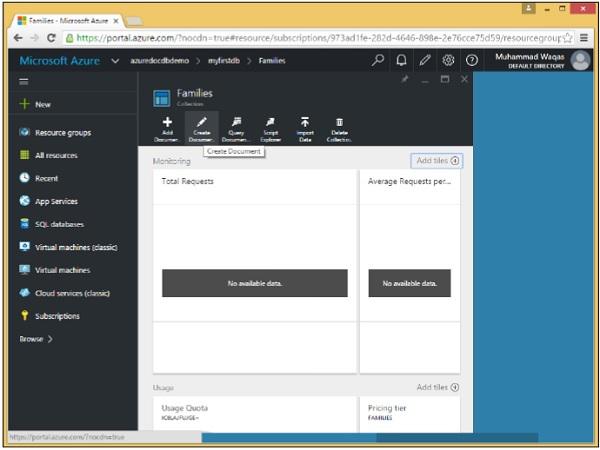
This is just a simple text editor that lets you type any JSON for a new document.
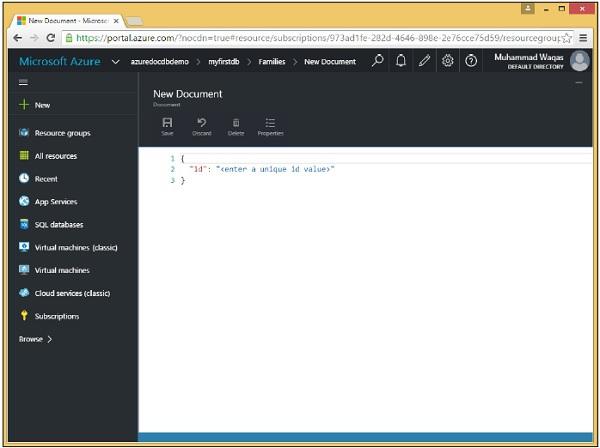
Step 3 − As this is raw data entry, let’s enter our first document.
{
   "id": "AndersenFamily",
   "lastName": "Andersen",

   "parents": [
      { "firstName": "Thomas", "relationship": "father" },
      { "firstName": "Mary Kay", "relationship": "mother" }
   ],

   "children": [
      {
         "firstName": "Henriette Thaulow",
         "gender": "female",
         "grade": 5,
         "pets": [ { "givenName": "Fluffy", "type": "Rabbit" } ]
      }
   ],

   "location": { "state": "WA", "county": "King", "city": "Seattle"},
   "isRegistered": true
}
When you enter the above document, you will see the following screen.
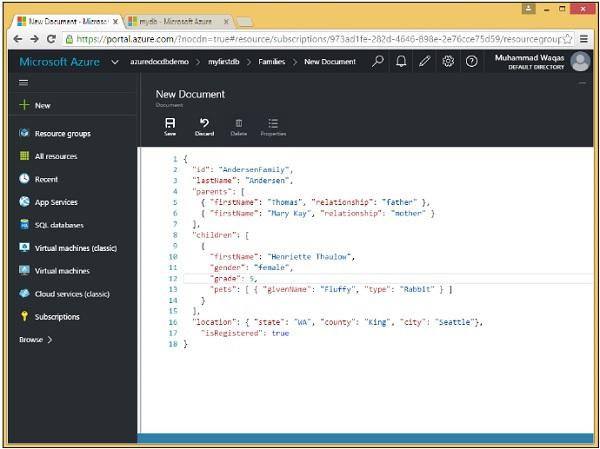
Notice that we've supplied an id for the document. The id value is always required, and it must be unique across all other documents in the same collection. When you leave it out then DocumentDB would automatically generate one for you using a GUID or a Globally Unique Identifier.
The id is always a string and it can't be a number, date, Boolean, or another object, and it can't be longer than 255 characters.
Also notice the document's hierarchal structure which has a few top-level properties like the required id, as well as lastName and isRegistered, but it also has nested properties.
For instance, the parents property is supplied as a JSON array as denoted by the square brackets. We also have another array for children, even though there's only one child in the array in this example.
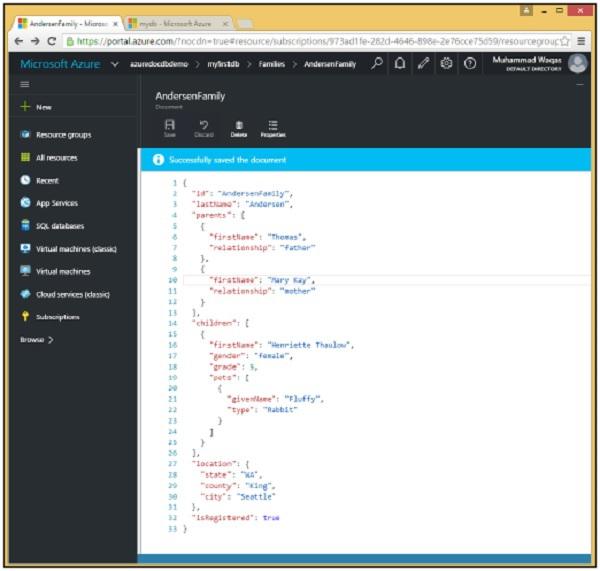
Step 4 − Click ‘Save’ button to save the document and we've created our first document.
As you can see that pretty formatting was applied to our JSON, which breaks up every property on its own line indented with a whitespace to convey the nesting level of each property.
The portal includes a Document Explorer, so let's use that now to retrieve the document we just created.
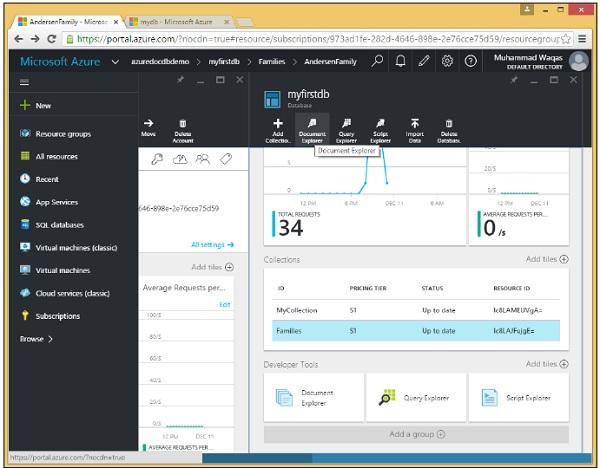
Step 5 − Choose a database and any collection within the database to view the documents in that collection. We currently have just one database named myfirstdb with one collection called Families, both of which have been preselected here in the dropdowns.
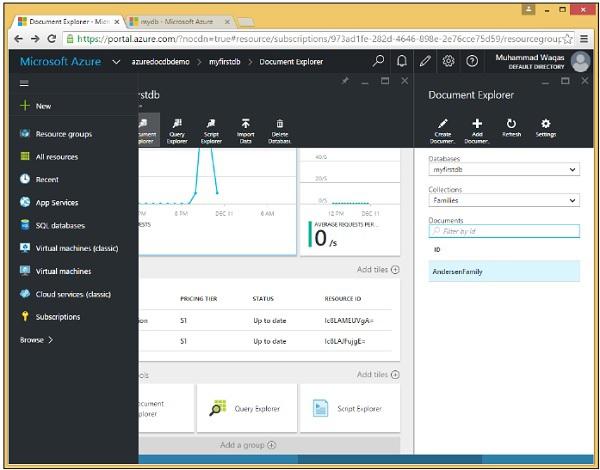
By default, the Document Explorer displays an unfiltered list of documents within the collection, but you can also search for any specific document by ID or multiple documents based on a wildcard search of a partial ID.
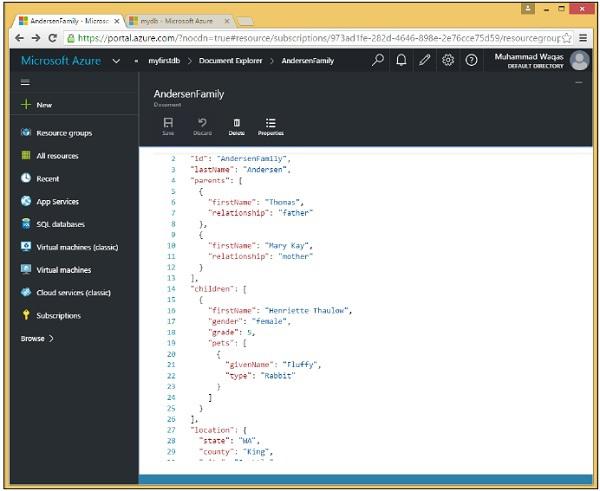
We have only one document in our collection so far, and we see its ID on the following screen, AndersonFamily.
Step 6 − Click on the ID to view the document.
Creating Documents with the .NET SDK
As you know that documents are just another type of resource and you've already become familiar with how to treat resources using the SDK.
The one big difference between documents and other resources is that, of course, they're schema free.
Thus there are a lot of options. Naturally, you can just work JSON object graphs or even raw strings of JSON text, but you can also use dynamic objects that lets you bind to properties at runtime without defining a class at compile time.
You can also work with real C# objects, or Entities as they are called, which might be your business domain classes.
Let’s start to create documents using .Net SDK. Following are the steps.
Step 1 − Instantiate DocumentClient then we will query for the myfirstdb database and then query for the MyCollection collection, which we store in this private variable collection so that it's accessible throughout the class.
private static async Task CreateDocumentClient() {
   // Create a new instance of the DocumentClient

   using (var client = new DocumentClient(new Uri(EndpointUrl), AuthorizationKey)) {
      database = client.CreateDatabaseQuery("SELECT * FROM c WHERE c.id =
         'myfirstdb'").AsEnumerable().First();

      collection = client.CreateDocumentCollectionQuery(database.CollectionsLink,
         "SELECT * FROM c WHERE c.id = 'MyCollection'").AsEnumerable().First();

      await CreateDocuments(client);
   }
}
Step 2 − Create some documents in CreateDocuments task.
private async static Task CreateDocuments(DocumentClient client) {
   Console.WriteLine();
   Console.WriteLine("**** Create Documents ****");
   Console.WriteLine();

   dynamic document1Definition = new {
      name = "New Customer 1", address = new {
         addressType = "Main Office",
         addressLine1 = "123 Main Street",
         location = new {
            city = "Brooklyn", stateProvinceName = "New York"
         }, postalCode = "11229", countryRegionName = "United States"
      },
   };

   Document document1 = await CreateDocument(client, document1Definition);
   Console.WriteLine("Created document {0} from dynamic object", document1.Id);
   Console.WriteLine();
}
The first document will be generated from this dynamic object. This might look like JSON, but of course it isn't. This is C# code and we're creating a real .NET object, but there's no class definition. Instead, the properties are inferred from the way the object is initialized.
Notice that we haven't supplied an Id property for this document.
Now let's have a look into CreateDocument. It looks like the same pattern we saw for creating databases and collections.
private async static Task<Document> CreateDocument(DocumentClient client,
   object documentObject) {

   var result = await client.CreateDocumentAsync(collection.SelfLink, documentObject);
   var document = result.Resource;

   Console.WriteLine("Created new document: {0}\r\n{1}", document.Id, document);
   return result;
}
Step 3 − This time we call CreateDocumentAsync specifying the SelfLink of the collection we want to add the document to. We get back a response with a resource property that, in this case, represents the new document with its system-generated properties.
The Document object is a defined class in the SDK that inherits from resource and so it has all the common resource properties, but it also includes the dynamic properties that define the schema-free document itself.
private async static Task CreateDocuments(DocumentClient client) {
   Console.WriteLine();
   Console.WriteLine("**** Create Documents ****");
   Console.WriteLine();

   dynamic document1Definition = new {
      name = "New Customer 1", address = new {
         addressType = "Main Office",
         addressLine1 = "123 Main Street",
         location = new {
            city = "Brooklyn", stateProvinceName = "New York"
         }, postalCode = "11229", countryRegionName = "United States"
      },
   };

   Document document1 = await CreateDocument(client, document1Definition);
   Console.WriteLine("Created document {0} from dynamic object", document1.Id);
   Console.WriteLine();
}
When the above code is compiled and executed you will receive the following output.
**** Create Documents ****
Created new document: 34e9873a-94c8-4720-9146-d63fb7840fad {
   "name": "New Customer 1",

   "address": {
      "addressType": "Main Office",
      "addressLine1": "123 Main Street",
      "location": {
         "city": "Brooklyn", "stateProvinceName": "New York"
      },
      "postalCode": "11229", "countryRegionName": "United States"
   },

   "id": "34e9873a-94c8-4720-9146-d63fb7840fad",
   "_rid": "Ic8LAMEUVgACAAAAAAAAAA==",
   "_ts": 1449812756,
   "_self": "dbs/Ic8LAA==/colls/Ic8LAMEUVgA=/docs/Ic8LAMEUVgACAAAAAAAAAA==/",
   "_etag": "\"00001000-0000-0000-0000-566a63140000\"",
   "_attachments": "attachments/"
}
Created document 34e9873a-94c8-4720-9146-d63fb7840fad from dynamic object
As you can see, we haven’t supplied an Id, however DocumentDB generated this one for us for the new document.


