cPanel - SSH / TLS
SSL (Socket Security Layer) or TLS (Transport Layer Security) is a mechanism for encrypting data, which is transferring from your computer to host or server and vice versa.
Generate Private Key
Private Key resides at your server and decrypts the incoming data coming from visitor’s device. Without Private Key, your server will not be able to decode the data sent by user. Private Key is automatically generated when generating a CSR.
To generate a Private Key, follow these steps −
Step 1 − Open cPanel SSL/TLS manager, by clicking on SSL/TLS found under the security section of cPanel.

Step 2 − In Private Keys, click on Generate, view, upload, or delete your private keys.

Step 3 − You can use Generate a New Private Key Interface to generate a new key.
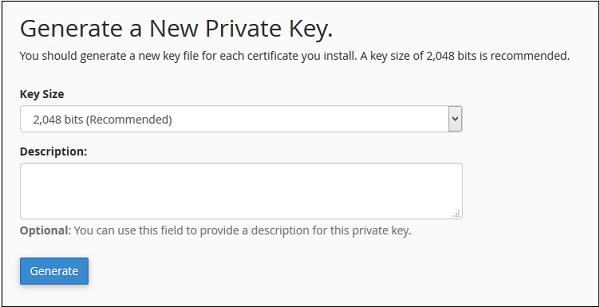
Step 4 − Choose a Key Size from the dropdown menu. Provide a description which is optional, you can leave it blank.
Step 5 − Click on Generate Button to generate a new private key.
Upload a Private Key
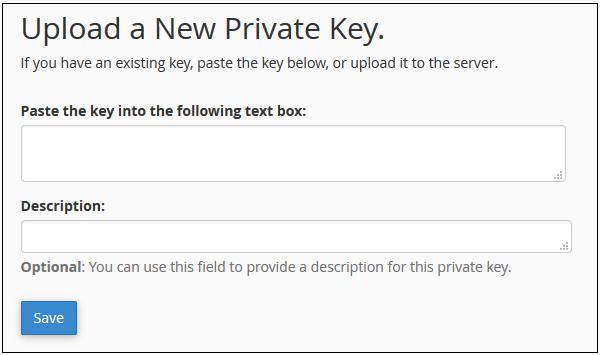
To upload a Private Key to your server, you can use the interface below to Generate a New Key Section, which is Upload a New Private Key. Just paste your existing key into textbox and provide a description. Then click Save to import the key.
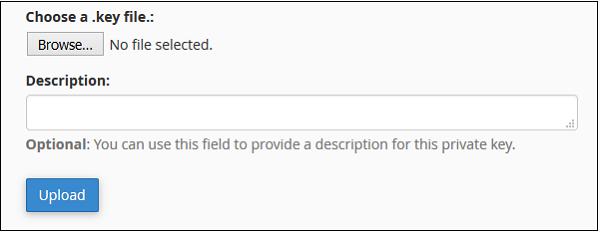
Or if you have an existing private key in ‘.key’ file, you can also import it. Just scroll down to choose a .key file under Upload a New Private Key. Browse for the file and select it. Click Upload button to Import the key into server.
Generate a CSR
CSR (Certificate Signing Request) is an encoded certificate, which CA authorities ask for when we purchase a SSL certificate from them. To issue a SSL certificate they need some additional information, which we provide in the CSR.
To generate a CSR, follow these steps below.
Step 1 − Click SSL/TLS link found under Security section of the cPanel.

Step 2 − Under Certificate Signing Request (CSR) click Generate, view, or delete SSL certificate signing requests.

Step 3 − In SSL Certificate Signing Request Interface, scroll down to see Generate a New Certificate Signing Request (CSR).
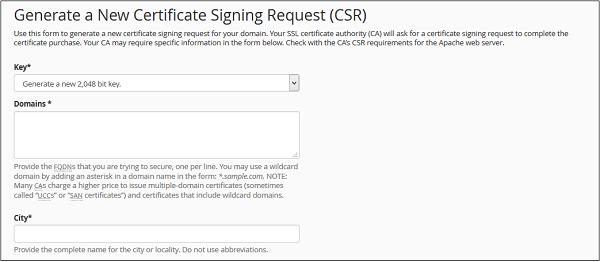
Step 4 − Choose an existing Private Key from Key dropdown. You can also choose to generate a new Private Key.
Step 5 − Enter Domains for which you want to generate CSR. You can choose a wild card domain by putting * as a subdomain. E.g. *.howcodex.com.
Step 6 − Provide all necessary information in text fields like City, State, Country, Company etc.
Step 7 − Click Generate Button to generate a CSR.
Upload an SSL / TLS Certificate
If you have obtained an SSL/TLS certificate from a Trusted Certificate Provider, then you will need to upload it to your server to use it on your website.
To generate Upload a SSL/TLS certificate, follow these steps below −
Step 1 − Click on SSL/TLS link found under Security section of cPanel.
Step 2 − Under Certificates (CRT), click on Generate, view, upload, or delete SSL certificates.

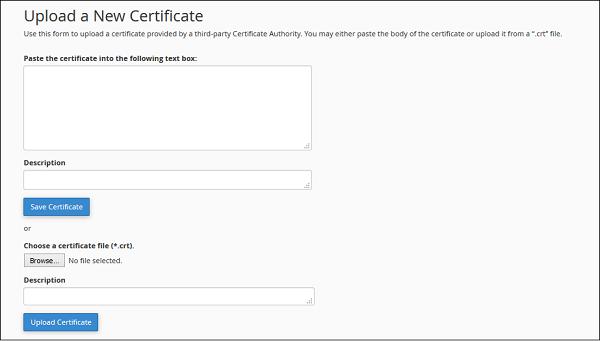
Step 3 − Scroll down to Upload a New Certificate, paste your SSL/TLS code in textbox and click Save Certificate or Upload a .crt file, which will be provided by hosting provider and Click Upload Certificate.
Self–Signed Certificate
You can also use a self–signed certificate on your website too, but when somebody will open your website, it will show an error that the certificate is not form a trusted certificate provider. It is recommended that in production environment, you use a purchased SSL/TLS certificate.
To Generate a Self–signed Certificate, you can follow these steps.
Step 1 − Scroll down to Generate a New Certificate in Certificates section.
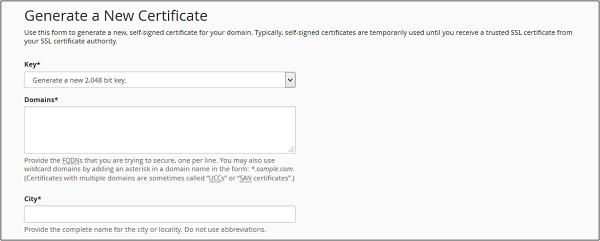
Step 2 − Choose an existing Private Key from Key dropdown, you can also choose to generate a new Private Key.
Step 3 − Enter Domains for which you want to generate CSR, you can choose a wild card domain by putting * as a subdomain. E.g. *.howcodex.com.
Step 4 − Provide all necessary information in text fields like City, State, Country, Company etc.
Step 5 − Click Generate to generate a Certificate.
Installing SSL
To activate SSL/TLS certificate in your domain or Subdomains follow these steps −
If you have obtained a SSL/TLS certificate from a Trusted Certificate Provider, to use it on your website, you will need to upload it to your server.
To generate Upload a SSL/TLS certificate, follow these steps below.
Step 1 − Click SSL/TLS link found under Security section of cPanel.
Step 2 − Under Certificates (CRT), click Install and Manage SSL for your site (HTTPS).

Step 3 − In this interface, you can choose to install SSL in your website. Scroll down to install an SSL Website.

Step 4 − Choose a certificate from the installed certificates by clicking on Browse Certificates. At the same time, you can also select a Domain from the dropdown box and Click Autofill by Domain.
Step 5 − All fields of Certificates, Private Key and Certificate Authority bundle will be filled automatically.
Step 6 − Click Install Certificate button to activate the certificate for the Domain or Subdomain.


